Cost-Effective Grading Tips: Lower Fees with Improved Centering
Discover cost-effective grading tips to improve centering practices, lower grading fees, and speed up processing through refined strategies and standardized checks.

Estimated reading time: 8 minutes
Key Takeaways
- Centering accuracy is a simple yet powerful way to reduce repeat evaluations and extra charges.
- Standardized pre-submission checklists and precise measurement tools catch alignment errors early.
- Software-assisted and AI-driven inspection can automate flagging of off-center items.
- Training and data-driven process adjustments eliminate recurring centering pitfalls.
- A holistic approach—combining centering best practices with workflow improvements—yields the biggest savings.
Table of Contents
- Introduction
- Understanding Grading Fees
- The Importance of Centering in Grading
- Cost-Effective Grading Tips Through Improved Centering
- Practical Strategies and Examples
- Additional Best Practices for Cost Savings
- Conclusion
- FAQ
Introduction
If you’re searching for cost-effective grading tips, one of the most powerful yet overlooked strategies is improving centering before submission or evaluation. Grading fees—charges levied to assess, classify, or certify quality—can erode profit margins, slow turnaround times, and force costly repeat work. Better centering techniques cut down on misalignments, retries, and manual reviews. When you align items precisely, you avoid many of the common triggers for extra charges. This post will show you how refined centering practices translate into lower grading fees, faster processing, and fewer headaches. Investopedia
Understanding Grading Fees
Grading fees vary based on multiple cost factors. Knowing what drives them up helps you target savings.
Key cost factors in grading fees:- Complexity of the item (shape, size, features)
- Time required for inspection or evaluation
- Number of defects or corrections needed
- Equipment, labor, and additional review steps
- Rush processing or resubmission charges
- Poor preparation before submission
- Inconsistent alignment or positioning
- Incomplete pre-checks and quality controls
- Avoidable defects that mandate reinspection
- Failing to meet baseline grading standards
Focusing on these areas—especially centering—can cut down on wasted effort and fees. For an in-depth look, check out this post.
The Importance of Centering in Grading
Centering is how evenly an item is positioned within its frame, boundary, or reference area. In card grading, it’s the balance of borders on all sides; in product grading, it’s alignment to a template or guide.
Why centering accuracy matters:- Poor centering lowers quality scores and grades
- Misaligned items need manual review and rework
- Increased rejection rates lead to resubmissions and fees
- Repeat submissions slow down overall turnaround
- Fewer alignment errors and grading hold-ups
- Streamlined workflow for graders and inspectors
- Reduced total grading fees and processing time
Consistent centering lets you pass more items on first glance, cutting down on repeat evaluations and extra charges. Source: PSA Grading Guide
Before you submit any items for grading, try using Card Centering Tool — a web app that measures centering with sub-millimeter precision and flags PSA, BGS, and CGC tolerances to help you avoid costly resubmissions and wasted fees.
Cost-Effective Grading Tips Through Improved Centering
Here are five actionable, cost-effective grading tips focused on centering. Use these strategies to catch errors early and minimize grading fees.
- Standardize Your Centering Checks
• Create a pre-submission checklist with fixed reference points, lighting conditions, and viewing angles.
• Define exact border widths or template margins for each item type.
• Ensure every operator follows the same process to catch alignment errors early and avoid repeat inspections.
Source: Beckett Checklist - Use Measurement Tools, Not Just Visual Estimates
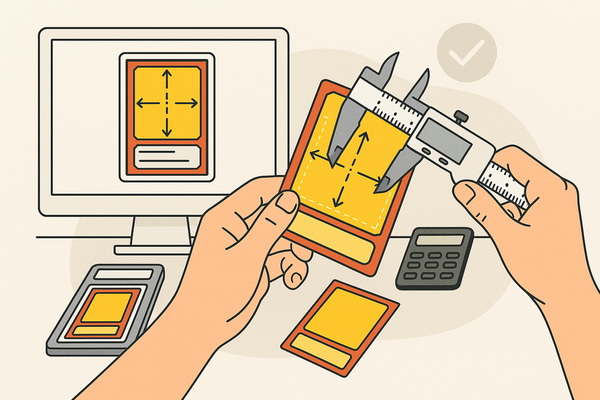
• Employ centering rulers, calipers, grid overlays, and alignment mats for physical items.
• Use high-resolution inspection cameras to zoom in on border edges.
• Quantify centering with precise measurements instead of relying on inconsistent human judgment.
For card collectors, see our step-by-step guide on measuring card centering. - Adopt Software-Assisted Evaluation
• Integrate image analysis software with edge-detection algorithms.
• Use border-detection apps and template-matching tools to highlight misalignments automatically.
• Leverage AI-assisted inspection platforms to flag off-center items before submission.
Source: AI Inspection - Train for Repeatable Positioning
• Conduct hands-on training sessions on proper handling techniques and tool usage.
• Demonstrate common centering mistakes and their impact on grading results.
• Emphasize consistent positioning under inspection conditions to minimize human error.
Source: Grading Training - Review and Address Recurring Problem Patterns
• Track which items are most prone to off-center issues—e.g., slippery surfaces, warped materials, uneven trimming, poor fixture design.
• Collect data on defect types and frequencies to spot trends.
• Adjust processes (fixtures, trimming guidelines, handling procedures) based on pattern analysis.
Learn how to spot off-center cards before grading.
Practical Strategies and Examples
Real-world examples show how these tips drive savings.
Example 1: Card Submission Workflow
Before: Operators relied on visual checks only; miscentering discovered after submission led to lower grades, and repeat fees added 15% to total grading costs.
After: A centering ruler and inspection light were mandated in the pre-check stage. Borders were measured to within 1% tolerance, cutting rejections by 70% and saving thousands in grading fees.
Example 2: Batch Review Process
Before: Items handled individually with no alignment template, slowing throughput.
After: Introduced a standard centering template and software overlay. Automated flagging of outliers cut manual checks by half, improved workflow speed by 30%, and reduced grading fees by 20%.
Step-by-Step Guide to Integrate Centering Improvements
- Define Your Centering Standard – Set measurable acceptance criteria (e.g., ±2% border variance).
- Add a Pre-Check Stage – Inspect each item for alignment before grading submission.
- Introduce Measurement Tools – Use physical rulers, mats, or digital overlays to verify centering.
- Document Common Centering Errors – Log defect types, root causes, and frequency for each batch.
- Adjust Fixtures and Process Based on Data – Update trimming guidelines, holder designs, or handling steps.
- Audit Outcomes Regularly – Compare grading fees, rejection rates, and turnaround times before and after changes.
Additional Best Practices for Cost Savings
Beyond centering, apply these complementary strategies for maximum savings:
- Pre-assessment Procedures: perform a quick quality scan to catch defects early.
- Streamlined Workflows: minimize handoffs and simplify steps.
- Batch Processing: group similar items to reduce setup time.
- Early Planning: schedule grading slots to avoid rush fees.
- Quality Control Checkpoints: add micro-inspections before final grading.
- Ongoing Operator Training: refresh skills and share best practices.
A holistic approach—combining centering improvements with these cost-saving practices—yields the greatest reduction in grading fees.
Conclusion
Effective cost-effective grading tips start with improving centering. By standardizing checks, using precise measurement tools, adopting software assistance, training operators, and analyzing problem patterns, you can avoid repeat evaluations and slash grading fees. When you pair centering best practices with pre-assessment, streamlined workflows, and batch processing, you create a robust system that saves time and money. Adopt these strategies today to lower your grading costs, speed up turnaround, and improve overall grading outcomes. Start refining your centering process now—your bottom line will thank you.
FAQ
- What is centering in grading?
- Centering refers to how evenly an item is positioned within its frame or reference area, like the borders on a trading card or alignment to a product template.
- How does better centering reduce fees?
- Accurate centering minimizes manual reviews, repeat submissions, and rush charges by ensuring items meet grading standards on the first submission.
- Which tools help with precise centering?
- Physical centering rulers, grid overlays, calipers, high-resolution cameras, and software with edge-detection algorithms are highly effective.
- Can AI really flag off-center items?
- Yes—AI-assisted inspection platforms analyze images for border variance and automatically highlight misalignments before submission.
- How often should I audit centering processes?
- Regular audits—monthly or quarterly—help track rejection rates, identify recurring issues, and refine your standards over time.