How to Measure Card Centering: A Step-by-Step Guide for Collectors
If you've ever pulled a card you thought was perfect, only to have it come back from PSA with a 9 instead of a 10, the culprit was probably centering. Centering is the single most overlooked factor in card grading, and it's also the one collectors have almost no control over once a card is printed. The good news? You can measure it yourself before you ever pay a grading fee, and once you know how to do it accurately, you'll never waste another submission on a card that was never going to gem.
This guide walks through exactly how card centering is measured, how to do it yourself (both manually and with a tool), and how to interpret what you find against the standards of the major grading companies.
What Is Card Centering?
Card centering is the measurement of how evenly the border around a card's image or design is distributed on all four sides. On a perfectly centered card, the distance from the edge of the printed image to the edge of the card stock would be identical on the left and right sides, and identical on the top and bottom. In reality, almost no card is perfectly centered. Printing and cutting are mechanical processes, and even cards from the same sheet can have meaningfully different centering depending on where the cutter landed.
Centering is expressed as a ratio. If a card's image is shifted slightly to the left, the left border will be smaller than the right border. A measurement of "55/45" means one side is 55% of the combined border width and the other is 45%. The closer the ratio is to 50/50, the better the centering.
There are two centering ratios for every card: left-to-right and top-to-bottom. Both matter, and the worse of the two usually drives the grade. There's also a front and a back. Grading companies measure all four ratios and the worst one tends to be the ceiling on your grade.
Why Centering Matters for Grading and Value
Every grading company - PSA, BGS, CGC, SGC - factors centering into the final grade. A card with sharp corners, no scratches, no print defects, and beautiful gloss can still receive a 9 instead of a 10 if the centering misses the cutoff by even a percentage point.
The financial impact is enormous. A PSA 10 of a popular modern card can sell for two, five, even ten times what the same card grades at 9. For some flagship rookies and chase cards, the gap is even wider. Centering is often the only thing standing between those two outcomes. That's why collectors who submit at scale obsess over centering before they ever fill out a submission form.
It's also why pre-grading inspection has become a serious part of the hobby. Knowing how to measure centering yourself - and knowing when to walk away from a submission - saves real money over time. Even at $25 per card in submission fees, getting it wrong on five cards a month adds up quickly.
How Card Centering Is Measured
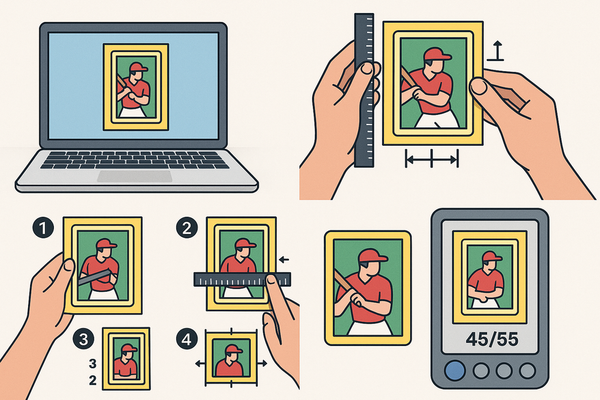
The standard method for measuring centering is straightforward in principle: you measure the width of the border on each side of the card's image, then compare opposite sides to each other.
For left-to-right centering, you measure the left border and the right border. If they add up to 4mm total, and the left side is 1.8mm and the right side is 2.2mm, the ratio is 45/55. To express it as percentages, divide each side by the total: 1.8 / 4 = 45%, and 2.2 / 4 = 55%.
For top-to-bottom centering, you do the same thing measuring the top border against the bottom border.
The "worst" ratio - the one furthest from 50/50 - is the one that grading companies typically focus on. A card that's 50/50 horizontally but 65/35 vertically will be judged on the 65/35.
Both front and back centering matter. Most grading companies hold the front to stricter standards than the back, but a wildly miscut back can still drag a grade down a notch.
How to Measure Card Centering Manually
You don't need anything fancy to do this. A clear plastic ruler with millimeter markings, a steady hand, and good lighting are enough.
Place the card on a flat surface in front of you. Make sure it's not in a sleeve or top loader for measurement, since plastic distortion can throw off readings. Position the ruler across the card horizontally, lining up the start of the scale with the very edge of the card stock on the left side.
Read the millimeter mark where the left edge of the printed border ends. That's your left border width. Then read where the right edge of the printed border begins, and subtract that from the total card width to get your right border width.
Do the math: left / (left + right) × 100 gives you the left percentage. The right percentage is 100 minus that.
Repeat the process vertically for top-to-bottom centering.
Then flip the card and do the same for the back. Backs are often printed and cut differently from fronts, so don't assume a centered front means a centered back.
The challenge with manual measurement is precision. Modern cards have borders that are sometimes only 2 to 3 millimeters wide. Being off by 0.2mm doesn't sound like much, but on a small border it can shift your reading by several percentage points. Steady hands, magnification, and good lighting all help.
How to Measure Card Centering with a Tool or App
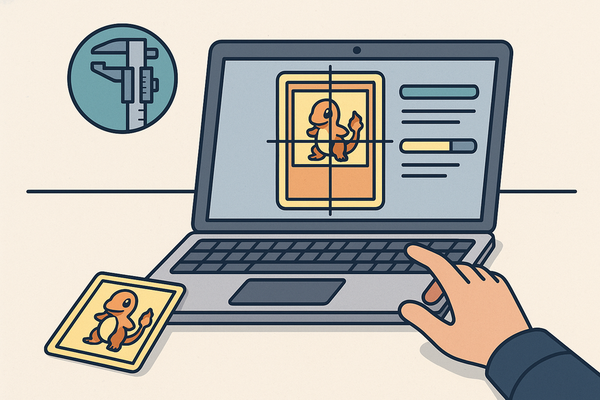
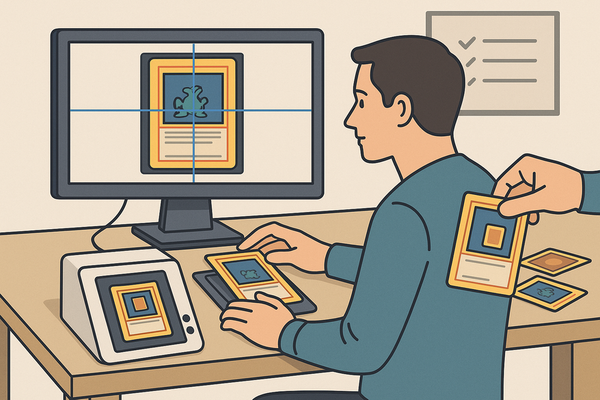
Because manual measurement is fiddly and slow, a lot of collectors now use dedicated centering tools or smartphone apps to do the work. These tools work by taking a high-resolution photo of the card and detecting the edges of both the card stock and the printed border, then calculating the ratios automatically.
The advantages are speed and consistency. You can measure dozens of cards in the time it would take to manually measure one, and you eliminate the human error of misreading a ruler or shifting the card mid-measurement. Sub-pixel edge detection from a good app can also be more accurate than what most people can achieve by eye with a ruler.
A good centering tool will give you both the left-to-right and top-to-bottom ratios for the front, and ideally the back as well. The best ones also flag whether the result would meet PSA, BGS, or CGC's gem mint standards, so you can make submission decisions on the spot without having to memorize every grader's tolerance chart.
If you're serious about submitting cards for grading, using a tool isn't a luxury - it's a way to protect your submission budget.
Understanding the Results: What Counts as Good Centering?
Once you have your ratios, the next question is whether they're good enough. The answer depends on what grade you're chasing and which company you're submitting to.
For a PSA 10, the commonly cited standard is 55/45 or better on the front, and 75/25 or better on the back. PSA does allow some discretion, and cards with strong eye appeal sometimes squeak through at 60/40, but planning around 55/45 is the safe bet.
For a PSA 9, the threshold is more forgiving: roughly 60/40 on the front and 90/10 on the back.
BGS is stricter at the top of the scale. To get a Pristine 10 centering subgrade, the card needs to be 50/50 on both axes for the front and 55/45 or better on the back. A Gem Mint 9.5 centering subgrade requires 55/45 front and 75/25 back.
CGC's standards are similar to PSA's at the Gem Mint level, with their Pristine 10 requiring near-perfect 50/50 centering.
If your card lands at 50/50 to 55/45 on both axes front and back, you're in great shape across all three companies. If you're at 60/40 or worse, you're playing roulette - the grade will depend on the specific card, the specific grader, and the company's mood that day.
Common Mistakes When Measuring Centering
A few mistakes show up over and over for collectors new to measuring.
The first is measuring with the card in a sleeve. The plastic warps the visible edges enough to throw the numbers off by a few percent. Always measure naked cards on a hard, flat surface.
The second is measuring to the wrong edge of the border. Some cards have multiple borders - a colored frame inside the white border, for example. Centering is measured to the outermost design element of the card, not the inner frame. If you measure to the wrong reference point, your ratios will be wrong.
The third is forgetting to measure both axes. A card can be perfect horizontally and disastrous vertically. You need both readings, and both have to clear the threshold.
The fourth is ignoring the back. PSA and BGS both factor back centering into the grade, and a back that's 80/20 or worse will pull a Gem Mint down a notch even if the front is pristine.
The fifth is rounding too aggressively. The difference between 54/46 and 56/44 might matter for a PSA 10. Use whole-millimeter precision at minimum, and ideally sub-millimeter if you're working with a tool.
The sixth is not accounting for camera angle if you're using a phone-based tool. Even a few degrees of tilt distorts the apparent border widths and can produce false readings. Shoot directly overhead with the card flat.
Frequently Asked Questions
Does centering matter more on vintage or modern cards?
It matters more on modern cards in the sense that modern cards are held to stricter standards. Vintage cards (pre-1980s) are graded on a curve that accounts for the printing variation of that era, so a 60/40 vintage card can still get a high grade. Modern cards have no such allowance.
Can I fix bad centering?
No. Trimming a card to improve centering is considered alteration and will result in a card being labeled "Evidence of Trimming" or rejected outright. Don't do it - graders can detect trimming and it permanently damages the card's value.
What if my card has no border?
Borderless or full-bleed cards are still graded for centering based on the centering of the image elements within the card. The principle is the same, even if there's no traditional border to measure.
How accurate do measurements need to be?
For decisions near a grading threshold, accuracy within one percentage point matters. For obvious off-centers (70/30 or worse), you don't need to be precise to know it won't gem.
Does centering vary across cards from the same pack?
Yes, often significantly. Cards in a single pack come from the same printing sheet but were cut at different positions. You can pull a 50/50 and a 65/35 from the same pack.
Final Thoughts
Measuring card centering is a small skill that pays back enormous dividends in the long run. Every submission you skip on a poorly centered card is money saved, and every PSA 10 you correctly identify before submitting is money made.
Start with the cards you're considering submitting, and get comfortable with the process. Within a dozen measurements, you'll start to recognize what 55/45 looks like at a glance, and you'll save yourself the heartbreak of submission disappointments. Whether you use a ruler or a centering app, the habit of checking before you ship is one of the most valuable habits any modern collector can build.