Emergency Centering Repair Tips for Grading Day
Discover quick emergency centering repair tips for grading day to save your card's grade and maintain its value. Get prepared with tools and expert advice.
Estimated reading time: 8 minutes
Key Takeaways
- Prepare a grading-day kit with centering tools, sleeves, holders, and gloves to act fast.
- Clean and measure borders using a centering gauge to get accurate front/back ratios.
- Triage submissions based on measured ratios: Gem Mint, Mint, or withhold.
- Correct mis-seated cards in penny sleeves and semi-rigid holders for proper alignment.
- Perform a final visual check under angled light and record your ratios for reference.
Table of Contents
- Understanding the Problem with Emergency Centering Repair Tips
- Tools and Preparation for Emergency Centering Repair Tips
- Step-By-Step Emergency Centering Repair Tips
- Common Challenges and Emergency Centering Repair Tips
- Expert Tips and Best Practices for Emergency Centering Repair Tips
- Conclusion
- FAQ
Section 1: Understanding the Problem with Emergency Centering Repair Tips
Last-minute grading-day mishaps often center on image positioning and border symmetry:
- Misjudging centering by eye under poor light or stress
- Skipping a centering gauge leads to borderline errors (e.g., 55/45 vs. 60/40)
- Crooked cards in sleeves or holders create the illusion of off-centering
- Dust and fingerprints hide true border edges
- Rushed pre-screening focuses on corners and surface, missing centering flaws
For a detailed primer on reading centering ratios, see detailed primer on reading centering ratios.
Impact on grades and value:
- Gem Mint 10 usually needs front centering 55/45–60/40 or better, back up to 75/25
- Beyond 60/40 often caps at Mint 9; past 70/30 caps around 8 or lower
- Consequences include lower grades, wasted fees, and less buyer interest
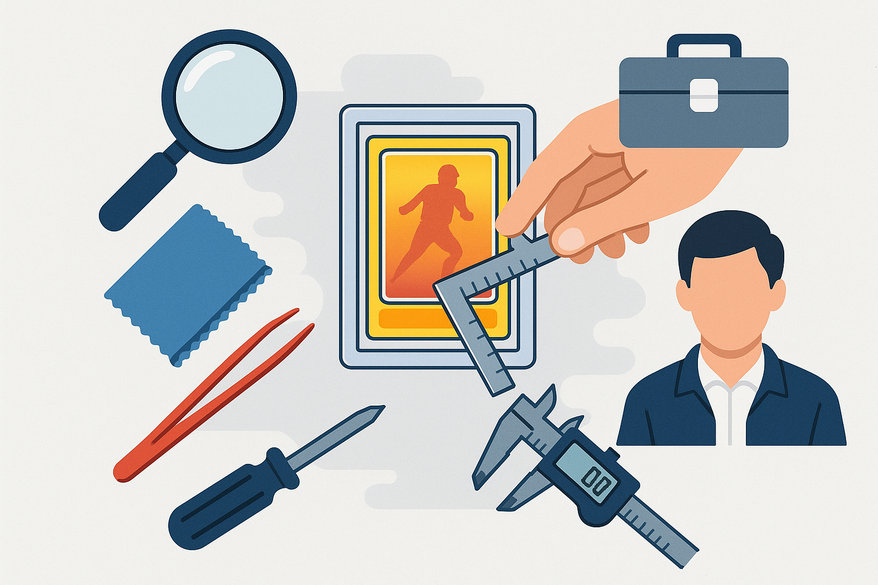
Section 2: Tools and Preparation for Emergency Centering Repair Tips
A small grading-day kit lets you act fast:
- Centering gauge with percentage scale – measures border gaps accurately
- Microfiber cloth – for dust and fingerprint removal
- Penny sleeves – protect card when using tools
- Semi-rigid holders/top-loaders – for final card seating
- Magnifier with light or LED desk lamp – for clear edge detection
- Nitrile or cotton gloves – prevent oils and prints
Safety precautions and prep:
- Always sleeve the card before using any tool
- Work on a clean, flat, non-abrasive surface (playmat or soft desk pad)
- Avoid excessive pressure when aligning or removing cards
- Keep food and drinks away from your workspace
- Handle cards by edges or through sleeves/holders only
If you spot an off-center card by eye, learn more at Is my card off-center? How to tell before grading.
Section 3: Step-By-Step Emergency Centering Repair Tips
This five-step process ensures accurate centering readings and corrects presentation shifts.
Step 1: Clean Borders for Clear Visibility
- Wear gloves; remove card from holder if needed.
- Insert the card into a fresh penny sleeve.
- Gently wipe the sleeve over card borders with a microfiber cloth in straight strokes—no liquids.
Step 2: Measure Centering with a Tool
- Lay the centering gauge flat.
- Place the sleeved card under the gauge per instructions.
- Align the thickest border side to the tool’s reference edge.
- Read measurements on all four sides; note left/right and top/bottom values.
- Use the tool’s percentage chart to convert measurements into ratios (e.g., “3–2” ≈ 60/40).
- Repeat for front and back.
Step 3: Decide If the Card Is Worth Submitting
- Front 55/45+ and back up to ~75/25 → likely Gem Mint candidate
- Front 60/40–65/35 → Mint 9 territory; weigh fee vs. potential grade
- Worse than 70/30 → consider withholding submission
Need quick fixes for borderline cards? See rapid repair techniques.
Step 4: Correct Mis-Seated Cards in Holders
- Remove the card; check and replace bent or wrinkled sleeves.
- Re-insert the card straight into a new penny sleeve.
- Tap the sleeve on a flat surface to settle the card evenly.
- Place in a semi-rigid holder; ensure equal space on all sides; tap gently to center.
Step 5: Final Visual Check and Notes
- Under angled light, verify border symmetry front and back.
- Compare visual check to tool readings.
- Record approximate ratios (e.g., F: 55/45, B: 60/40) for your records.
Section 4: Common Challenges and Emergency Centering Repair Tips
Challenge 1: Busy Artwork or Foil Hides Border Edge
- Use angled light to cast a shadow at the border.
- Switch to a tool with clear reference lines.
- Anchor on consistent design elements (logos, text boxes).
Challenge 2: Border Ends Between Tool Marks
- Average between lines; estimate ratio via chart.
- If near a threshold, assume the worse number to stay conservative.
Challenge 3: Card Shifts in Sleeve
- Use correct sleeve size; tap the card to seat before holder insertion.
- Avoid bending the sleeve to push the card down.
Challenge 4: Late Discovery on Grading Day
- Re-measure borderline cards immediately.
- Remove sub-standard cards from your submission pile.
- If forced to submit, note centering limitations in your records.
Section 5: Expert Tips and Best Practices for Emergency Centering Repair Tips
Advanced Repair and Assessment Tips
- Always sleeve before tools to avoid micro-scratches.
- Check back centering first; it often caps grades silently.
- Use a magnifier with light for precise edge detection.
- Keep reference cards with known ratios (e.g., 55/45, 65/35) for quick visual benchmarks.
Preventive Measures
- Integrate centering checks into routine sorting.
- Pre-sort cards by centering brackets (50/50–55/45, 60/40, >65/35).
- Learn each grading company’s centering standards.
- Use high-quality sleeves and holders to reduce mis-seating risks.
Conclusion
Emergency centering repair tips—clean borders, measure with a centering tool, triage by measured ratios, and correct mis-seated cards—can save grading fees and protect your card’s grade and market value. Being prepared with the right tools and processes lets you make fast, confident decisions when time is tight.
Subscribe for more grading day strategies and share your own emergency centering repair tips and experiences below.
FAQ
How accurate is a centering gauge tool?
A quality gauge provides measurements within 1–2% accuracy. Always calibrate against known reference cards before use.
Can I adjust centering after submission?
Once submitted, grading companies won’t recenter cards. Perform all adjustments beforehand and record your ratios.
What is the ideal centering ratio for a Gem Mint 10?
You’ll need front centering of at least 55/45–60/40 and back centering up to 75/25 to meet PSA or BGS Gem Mint standards.
Should I correct back centering as rigorously as the front?
Yes—while front centering is critical, back centering can silently cap your grade if it exceeds thresholds like 75/25.


