Card Centering Analyzer Tutorial: Your Complete Guide to Perfect Centering
Learn to use a card centering analyzer for perfect card centering. This tutorial covers setup, workflows, and advanced tips for optimal grading decisions.


Estimated reading time: 7 minutes
Key Takeaways
- Precision matters: Even minor off-centering can cost subgrade points.
- Automation wins: Analyzers deliver faster, more accurate ratios than manual methods.
- Consistent setup: Square shots and uniform lighting ensure reliable results.
- Advanced tools: Features like batch processing and multi-grader comparisons streamline workflows.
Table of Contents
- Overview of the Card Centering Analyzer
- Getting Started with Card Centering Analyzer
- Exploring the User Interface and Basic Functions
- Intermediate Usage: Performing a Full Centering Analysis
- Advanced Features
- Practical Use Cases
- Conclusion and Next Steps
Introduction: Card centering describes how evenly the printed image sits within the card borders, expressed as ratios like 50/50, 55/45, or 60/40. Grading companies such as PSA, BGS, and CGC weigh centering heavily in subgrades. Using an analyzer automates measurements, saves time, and reduces errors compared to manual methods. To compare manual vs. automated approaches, see our manual vs. automated measurement guide.
For a turnkey solution, consider the Card Centering Tool, offering sub-millimeter precision and pre-submission threshold flags.
Overview of the Card Centering Analyzer
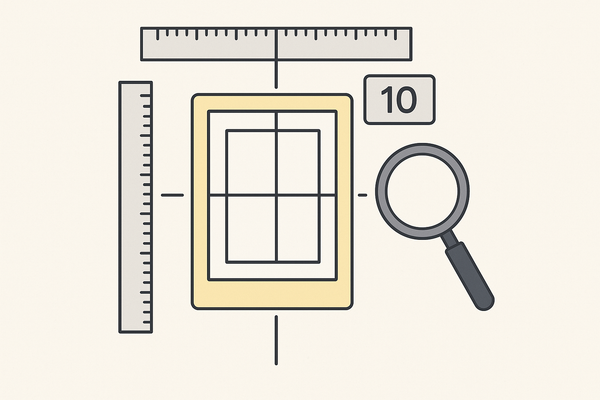
A card centering analyzer can be either a software solution or a physical gauge:
- Digital software: Uses AI to detect borders, calculate ratios, and predict grading outcomes.
- Physical gauge: A transparent ruler with printed scales for manual measurements.
These analyzers offer accurate, repeatable measurements, instant front/back ratios, and time-saving batch processing—far superior to traditional ruler methods. For more, explore our essential centering tips.
Getting Started with Card Centering Analyzer
To begin, ensure you have:
- Hardware: A smartphone or camera-equipped computer, even lighting, and a flat, high-contrast surface.
- Software: A modern browser or an app like Jade Lizard’s Card Centering Calculator (App Store or Google Play).
Then follow these steps:
- Open your centering analyzer portal.
- Capture clear, square-on photos of your card’s front and back.
- Upload images and let the analyzer work its magic.
Exploring the User Interface and Basic Functions
Most analyzers feature:
- An upload panel (“Upload Front,” “Upload Back”).
- A preview window with border overlays.
- A results panel showing centering ratios.
- A grade projection section for PSA, BGS, and CGC cutoffs.
Basic workflow:
- Upload the front image; wait for edge detection.
- Upload the back image; view combined centering ratios.
- Compare sides, note the worst ratio.
- Review grade projections and decide on submission.
Intermediate Usage: Performing a Full Centering Analysis
For a comprehensive analysis:
- Prepare: Remove cases, set up lighting and background.
- Capture: Square-on photos with margins.
- Upload Front: Adjust draggable markers if needed.
- Upload Back: Await combined ratio calculation.
- Interpret: E.g., 1.2 mm ÷ 3.0 mm = 40%, yielding a 60/40 ratio.
- Compare: Reference PSA 10 (≥ 45/55), BGS, and CGC thresholds.
Advanced Features
- Manual edge adjustment with draggable markers.
- Multi-grader comparison side by side.
- Front vs. back gating logic for worst-side grading.
- Batch processing and export to grading-prep spreadsheets.
Learn more about advanced measurement optimization methods.
Practical Use Cases
Example scenarios:
- Pre-grading a Pokémon card: Front 50/50, Back 55/45 → meets PSA cutoff → submit.
- Investment decision: Front 65/35, Back 60/40 → fails gem-mint → renegotiate.
- Physical gauge measurement: Manual border readings compared to standards.
Conclusion and Next Steps
By now, you understand how a card centering analyzer delivers precise ratios, grade predictions, and workflow efficiency. From setup to advanced features and real-world examples, you’re ready to optimize your grading decisions. Start analyzing your next card today and subscribe for more tutorials!
FAQ
- Q: Why are results inconsistent?
A: Ensure square photos, consistent lighting, and take multiple images. - Q: How do I fix misread edges?
A: Use a contrasting background, reduce glare, and adjust edges manually. - Q: Is front and back required?
A: Yes; grading houses gate on the worst side. - Q: What are gem-mint ratios?
A: PSA 10 requires ≥ 45/55; analyzers display all major thresholds.