How to Improve Card Grading Results: 9 Essential Tips for Collectors
Learn how to improve card grading results with 9 essential tips for handling, storing, and submitting cards to boost your collection's value.

Estimated reading time: 12 minutes
Key Takeaways
- Learn grading criteria—centering, corners, edges, surface, print quality.
- Prepare cards with proper handling, storage, and preservation.
- Select the best candidates by comparing duplicates under good light.
- Document condition with clear, glare-free photos.
- Follow a step-by-step submission process to avoid errors.
- Choose the right grading service based on fees, turnaround, and market trust.
Table of Contents
- Understanding Card Grading
- Preparing Your Cards for Grading
- Tips to Improve Card Grading Results
- Optimizing the Grading Submission Process
- Additional Considerations
- Conclusion
1. Understanding Card Grading to improve card grading results
Card grading is the professional evaluation of a collectible card’s condition, authenticity, and overall quality. It drives market trust and resale value. A high grade tells buyers your card is well cared for; low grades can drag prices down. Start improving your grades by mastering the basics:
- Centering: Image alignment on the card.
- Corners: Sharpness and wear at the tips.
- Edges: Chips, fraying, or dents.
- Surface: Scratches, gloss issues, or stains.
- Print Quality: Color fidelity and factory defects.
Real-World Tip: Compare duplicates under bright light to pick the best candidate before submission.
Sources: PSA Grading Guide, PSA Grading Costs vs Value
2. Preparing Your Cards for Grading to improve card grading results
2.1 Handling & Storage Best Practices
Proper handling and storage keep cards in pack-fresh condition:
- Hold cards by the edges or wear nitrile gloves.
- Use penny sleeves, top loaders, or semi-rigid holders.
- Store away from heat, direct sunlight, and humidity.
- Stack holders flat in a stable box to prevent bending.
2.2 Cleaning & Preservation Tips
Protect your card’s surface and edges:
- Avoid liquids, chemicals, or abrasive cloths.
- Gently remove loose dust with a soft brush or blower.
- Never attempt to repair creases or corners.
- Sleeve immediately after handling to prevent fingerprints.
2.3 Environmental Factors Affecting Condition
Your storage environment matters:
- Monitor humidity and temperature swings.
- Keep cards dust-free; use sealed containers if needed.
- Choose archival-quality materials that won’t warp or off-gas.
- Avoid stacking heavy items on card holders.
Sources: PSA Protection Tips, SportsCardResource Storage Tips
3. Tips to Improve Card Grading Results
3.1 Minimize Wear & Prevent Damage
Protect cards from the moment you open the pack:
- Inspect immediately under bright light, then sleeve and top-load.
- Transport in hard cases; avoid jamming cards into tight sleeves.
- Keep high-value cards separate from bulk pulls to prevent dings.
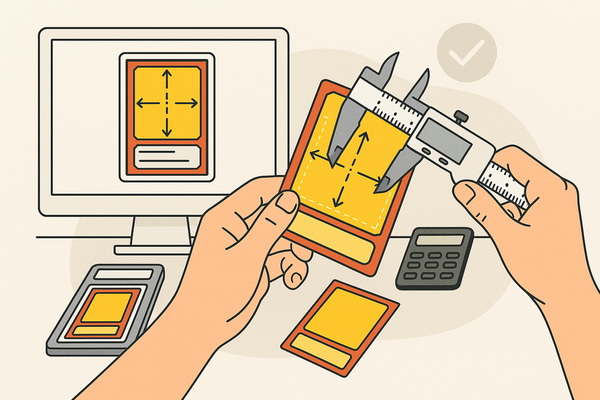
3.2 Ensure Optimal Centering & Presentation
Centering is non-negotiable:
- For duplicates, pick the best factory centering by learning how to measure card centering.
- Check alignment under glare-free lighting.
- Avoid cards with visible print shifts or off-center borders; see how to tell off-centering.
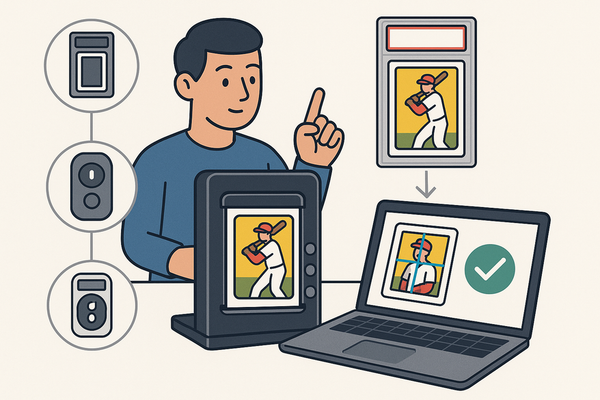
3.3 Document Condition with High-Quality Images
Photos prove your card’s state before grading:
- Capture front, back, corners, edges, and any flaws.
- Use even, glare-free light for clear detail.
- Save images to compare with your grading results or dispute if needed.
3.4 Choose the Right Grading Service
Your chosen company affects outcomes:
- Compare recognition, turnaround times, subgrade reports, and fees.
- For resale value, pick the service trusted by buyers.
- Review centering tolerances compared across major graders.
Sources: Beckett Wear Tips, PSA Photo Guidelines, PSA First Submission
4. Optimizing the Grading Submission Process to improve card grading results
4.1 Step-by-Step Pre-Submission Review
Follow these nine steps before sealing your submission:
- Examine the card under strong lighting.
- Check centering on both front and back.
- Inspect corners for whitening or softening.
- Review edges for chips, frays, or dents.
- Scan the surface for scratches, print lines, or stains.
- Confirm the card’s identity and authenticity.
- Compare against your grader’s submission thresholds.
- Place the card in the correct holder and verify protection.
- Complete submission forms accurately, declaring full values.
4.2 Common Mistakes to Avoid
Beware these pitfalls:
- Sending damaged cards or using dirty sleeves.
- Mislabeling forms or undervaluing cards.
- Skipping insurance or using inadequate packaging.
4.3 Emulating Professional Workflow Practices
Mirror expert graders to reduce errors:
- Set up a dedicated inspection station with consistent lighting.
- Keep notes on each card: condition, cost, and grader feedback.
- Sort cards into tiers by condition and value before submission.
Sources: Common Grading Mistakes, Submit Cards Like a Pro
5. Additional Considerations to improve card grading results
5.1 Cost-Benefit Analysis
Grading has real expenses:
- Fees per card (standard or express).
- Shipping and insurance costs.
- Supplies: sleeves, holders, boxes.
- Time spent prepping and documenting.
Compare these to potential resale gains; rare or near-perfect cards often justify costs, while common cards may not.
5.2 Future Trends in Card Grading
The grading landscape is evolving:
- AI-assisted condition analysis for faster subgrades.
- Advanced imaging to spot minute defects.
- Improved counterfeit detection to build trust.
- Digital verification for speed and accuracy.
5.3 Collector Case Study
A veteran collector submitted five raw copies of a rare rookie. He chose the best-centered card, handled it with gloves, and documented corners and edges with detailed photos. That card earned a 9.5—while its siblings scored 9.0 or below. Discipline and preparation paid off in resale value.
Sources: PSA Grading Costs vs Value, PSA Future Grading, Hobby Insider Case Study
Conclusion
Improving card grading results starts with knowledge, discipline, and attention to detail:
- Careful handling and stable storage.
- Smart selection for centering and surface quality.
- Thorough photo documentation.
- Step-by-step submission workflow.
- Choosing the right grading service and weighing costs vs. benefits.
Your cards reflect your effort. Apply these tips to boost grading outcomes and market confidence. Start today to improve card grading results—and share your successes or questions below.
For precise front and back centering measurements that take the guesswork out of choosing the best candidate, try Card Centering Tool.
FAQ
- What are the main criteria graders assess?
They examine centering, corners, edges, surface condition, and print quality to assign subgrades. - How should I document my card before submission?
Take clear, glare-free photos of the front, back, corners, edges, and any flaws; save them for comparison or dispute. - Which grading service is best for high-value cards?
Choose the one with the strongest market recognition and the subgrade detail you need; PSA, BGS, and CGC are popular options.