Maximize Grading Acceptance: A Step-by-Step Guide for Collectors
Learn how to maximize grading acceptance for your cards with our step-by-step guide, ensuring top grades and protecting your investment.

Estimated reading time: 9 minutes
Key Takeaways
- Understand the card grading process and its effect on value.
- Pre-screen and prepare cards to meet grading criteria.
- Handle and package cards properly to avoid damage.
- Choose reputable grading services and follow their guidelines.
- Use accurate photos and honest descriptions for market confidence.
Table of Contents
- 1. What Is Card Grading and Why It Matters
- 2. Defining “Maximize Grading Acceptance”
- 3. How Grading Acceptance Impacts Value & Marketability
- 4. Key Grading Criteria & Standards
- 5. Common Pitfalls in Card Grading Submissions
- 6. Preparing Cards to Maximize Grading Acceptance
- 7. Proper Handling, Storage & Packaging
- 8. Cleaning & Protecting Cards Without Damage
- 9. Accurate Descriptions & High-Quality Images
- 10. Working with Reputable Grading Services
- 11. Best Practices & Further Resources
- 12. Conclusion & Recap
1. What Is Card Grading and Why It Matters
Card grading is a professional evaluation of your trading card’s authenticity and condition. Graders inspect centering, corners, edges, and surface under strong light and magnification, assign a grade from 1 to 10, then seal the card in a tamper-evident slab.
- Authentication
- Verifies the card is genuine.
- Detects counterfeits or alterations.
- Condition Assessment
- Uses LED lighting and a 10×–30× loupe.
- Examines centering, corners, edges, and surface defects.
- Grading Scale
- 1–10, where 10 = Gem Mint (flawless).
- Near Mint (8–9) shows tiny wear; lower grades reveal more flaws.
- Encapsulation
- Card is sealed in a clear, hard case (slab).
- Label displays grade and serial number.
- Tamper-evident seal protects the card.
Why it matters:
- Value Premium – Graded cards can sell for many times more than raw cards. High grades command big premiums. Source: BallerStatus
- Authenticity Assurance – Buyers trust slabs over raw cards; graders catch fakes. Source: Splint Invest
- Market Trust & Liquidity – Graded cards sell faster on eBay, PWCC, and auctions. Source: Get Graded
- Preservation – Slabs shield cards from dust, moisture, and handling. Source: PSA Grading Guide
2. Defining “Maximize Grading Acceptance”
Maximize grading acceptance means sending only authentic, unaltered, high-condition cards, packaged and documented to minimize rejection, reclassification, or sub-par grades.
- Authentication Acceptance – Card accepted as genuine with no “no grade” returns.
- Target-Grade Acceptance – Cards consistently earn your desired grade (e.g., PSA 9/10).
3. How Grading Acceptance Impacts Value & Marketability
Maximizing grading acceptance boosts:
- Market Value – A PSA 10 sells for many times more than a raw card; PSA 8 or 9 still commands a premium.
- Buyer Confidence – Slabbed, authenticated cards reduce buyer risk.
- Liquidity – Graded cards list faster on major platforms with fewer disputes.
- Portfolio Stability – Consistent high grades justify grading fees and build a verifiable track record.
4. Key Grading Criteria & Standards
Graders focus on five main criteria:
- Centering – Measures border ratios front/back. PSA 10 allows up to 55/45 front and 75/25 back.
- Corners – Looks for whitening or rounding under magnification.
- Edges – Checks for chips, frays, or wear along borders.
- Surface – Spots scratches, print lines, or discoloration under tilted light.
- Authenticity/Alterations – Trimming or recoloring triggers an “altered” label or rejection.
For manual and automated centering techniques, see our guide: Measuring Card Centering and Centering Tolerances Compared.
- 10 (Gem Mint): Factory-perfect, almost no flaws.
- 9 (Mint): Very slight wear; nearly flawless.
- 7–8 (Near Mint): Light wear visible under magnification.
- 4–6 (VG–EX): Noticeable wear but intact.
- 1–3 (Poor–Good): Heavy creases, stains, or damage.
5. Common Pitfalls in Card Grading Submissions
- Sending Everything Instead of Pre-Screening
- Avoid by using a bright LED lamp and 10× loupe.
- Set a value threshold: only send cards likely to earn your target grade.
- For off-center spotting tips, see Off-Center Detection Guide.
- Not Checking Alterations – Buy from trusted sellers and compare to genuine examples.
- Poor Handling & Storage – Handle by edges with nitrile gloves; store in fresh penny sleeves and Card Savers.
- Bad Packaging – Stack cards in holders, sandwich between cardboard, use bubble wrap and a sturdy box.
- Improper Cleaning – No liquids or abrasives; only remove loose dust with a hand-bulb blower or microfiber cloth.
- Misunderstanding Standards – Read population reports and realistic grade examples.
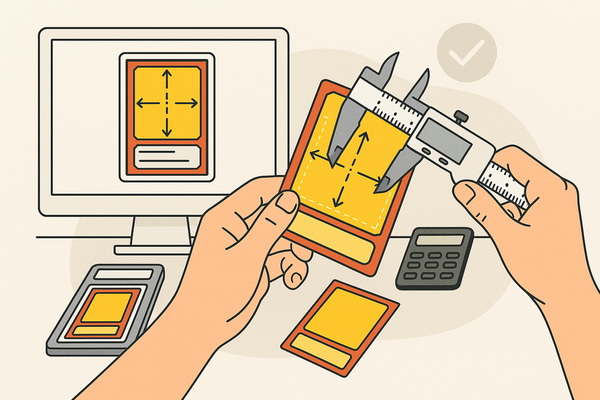
6. Preparing Cards to Maximize Grading Acceptance
Ensuring Optimal Condition:
- Tools: bright LED lamp and 10×–30× magnifier.
- Inspect corners, edges, surface, and centering; document any flaws.
- Sort cards by grade potential: Gem Mint candidate, strong 9, mid-grade, or reject.
- Check planarity for bends or warping.
You can streamline centering checks with the Card Centering Tool, which measures ratios automatically against PSA, BGS, and CGC tolerances.
7. Proper Handling, Storage & Packaging
Handling Best Practices:
- Wash and dry hands; avoid lotions.
- Hold cards by edges on a clean, lint-free mat.
Sleeves & Holders:
- Use fresh penny sleeves, one card per sleeve.
- Place in semi-rigid Card Savers or required holders.
Submission Order & Paperwork:
- Match card order to form order.
- Label service levels clearly for multiple batches.
Shipment Packaging:
- Stack holders, secure with painter’s tape around a team bag (never tape holders directly).
- Sandwich between rigid cardboard; wrap with bubble wrap; pack in a sturdy box.
- Fill voids to prevent movement; ship with tracking and insurance.
8. Cleaning & Protecting Cards Without Damage
Safe Practices:
- Remove dust with a hand-bulb air blower or gentle canned air at a distance.
- Very light microfiber wipe on non-foil surfaces in a single direction only.
Practices to Avoid:
- Liquids, alcohol, cleaning solutions.
- Erasers, polish, adhesives.
- Pressing cards under weight or attempting to “fix” edges.
When in doubt, do less—tiny dust specks are better than micro-scratches.
9. Accurate Descriptions & High-Quality Images
Pre-Grading Photos:
- High-resolution, well-lit images of raw cards.
- Close-ups of centering, corners, edges, and surface defects.
Post-Grading Images for Sale:
- Full slab front and back.
- Close-up of the label showing grade and serial number.
- Photos of any case flaws, not the card itself.
Honest Listing Details: Clearly state the grade and any subgrades or special labels to cut returns and negative feedback.
10. Working with Reputable Grading Services
Choosing a Company:
- Market recognition: PSA, BGS, SGC, CGC.
- Turnaround times vs. cost.
- Specialization by card type (sports, TCG, vintage).
- Review published standards and population reports.
Submission Rules:
- Card size and condition requirements.
- Holder type and labeling guidelines.
- Minimum grade requests and insurance thresholds.
- Follow guidelines exactly to avoid delays or mishandling.
11. Best Practices & Further Resources
Top 7 Practices to Maximize Grading Acceptance:
- Pre-screen ruthlessly—only send cards with real grade potential.
- Handle correctly—edges only; use gloves if needed.
- Pack securely—semi-rigid holders, taped team bag, bubble wrap, sturdy box.
- Clean minimally—dry dust removal only.
- Do the math—compare fees to expected grade value.
- Track your results—log grades to improve your eye.
- Stay informed—read company guides and community updates.
Further Resources:
- PSA grading standards
- BallerStatus in-depth grading guide
- Splint Invest investor’s guide
- Get Graded educational pieces
- ISA Grading tutorials
12. Conclusion & Recap
Maximizing grading acceptance means focusing on two goals: authentication and target grades. To achieve this:
- Pre-screen aggressively for centering, corners, edges, and surface.
- Handle and store cards with care from day one.
- Package each submission per company rules and insure it.
- Clean only with air and microfiber—no liquids or abrasives.
- Use high-quality photos and honest descriptions.
- Choose reputable grading services and follow their guidelines.
- Keep learning from each submission to refine your process.
Implement these strategies to reduce rejections, boost grades, and protect your investment.
FAQ
- How long does grading take? Turnaround varies by service level and company; standard windows range from 2 days to 12+ weeks.
- What if my card is returned ungraded? Review the “no grade” reason, adjust your pre-screening, and consider a lower cost service level.
- Can I clean my card before grading? Only remove loose dust with a hand-bulb blower or microfiber; avoid liquids and abrasives.
- Do I need to insure my shipment? Yes—insuring protects against loss or damage during transit and is often required by grading companies.
- What if my card is marked “altered”? Avoid alterations entirely; submit only original, unmodified cards purchased from reputable sources.