How to Take Pictures of Cards Without Glare: Pro Card Photography Tips
Learn how to take pictures of cards without glare. Get expert card photography tips, best scanning methods, and centering photo advice for flawless grading prep.

Estimated reading time: 13 min
Key Takeaways
- Glare-free card photos require controlled lighting, correct angles, and thoughtful setup.
- Camera settings and positioning are as crucial as the lighting source for clear, accurate images.
- Flatbed scanners offer a reliable alternative to cameras for no-glare results and high detail.
- Proper photo technique improves card centering analysis and grading predictions.
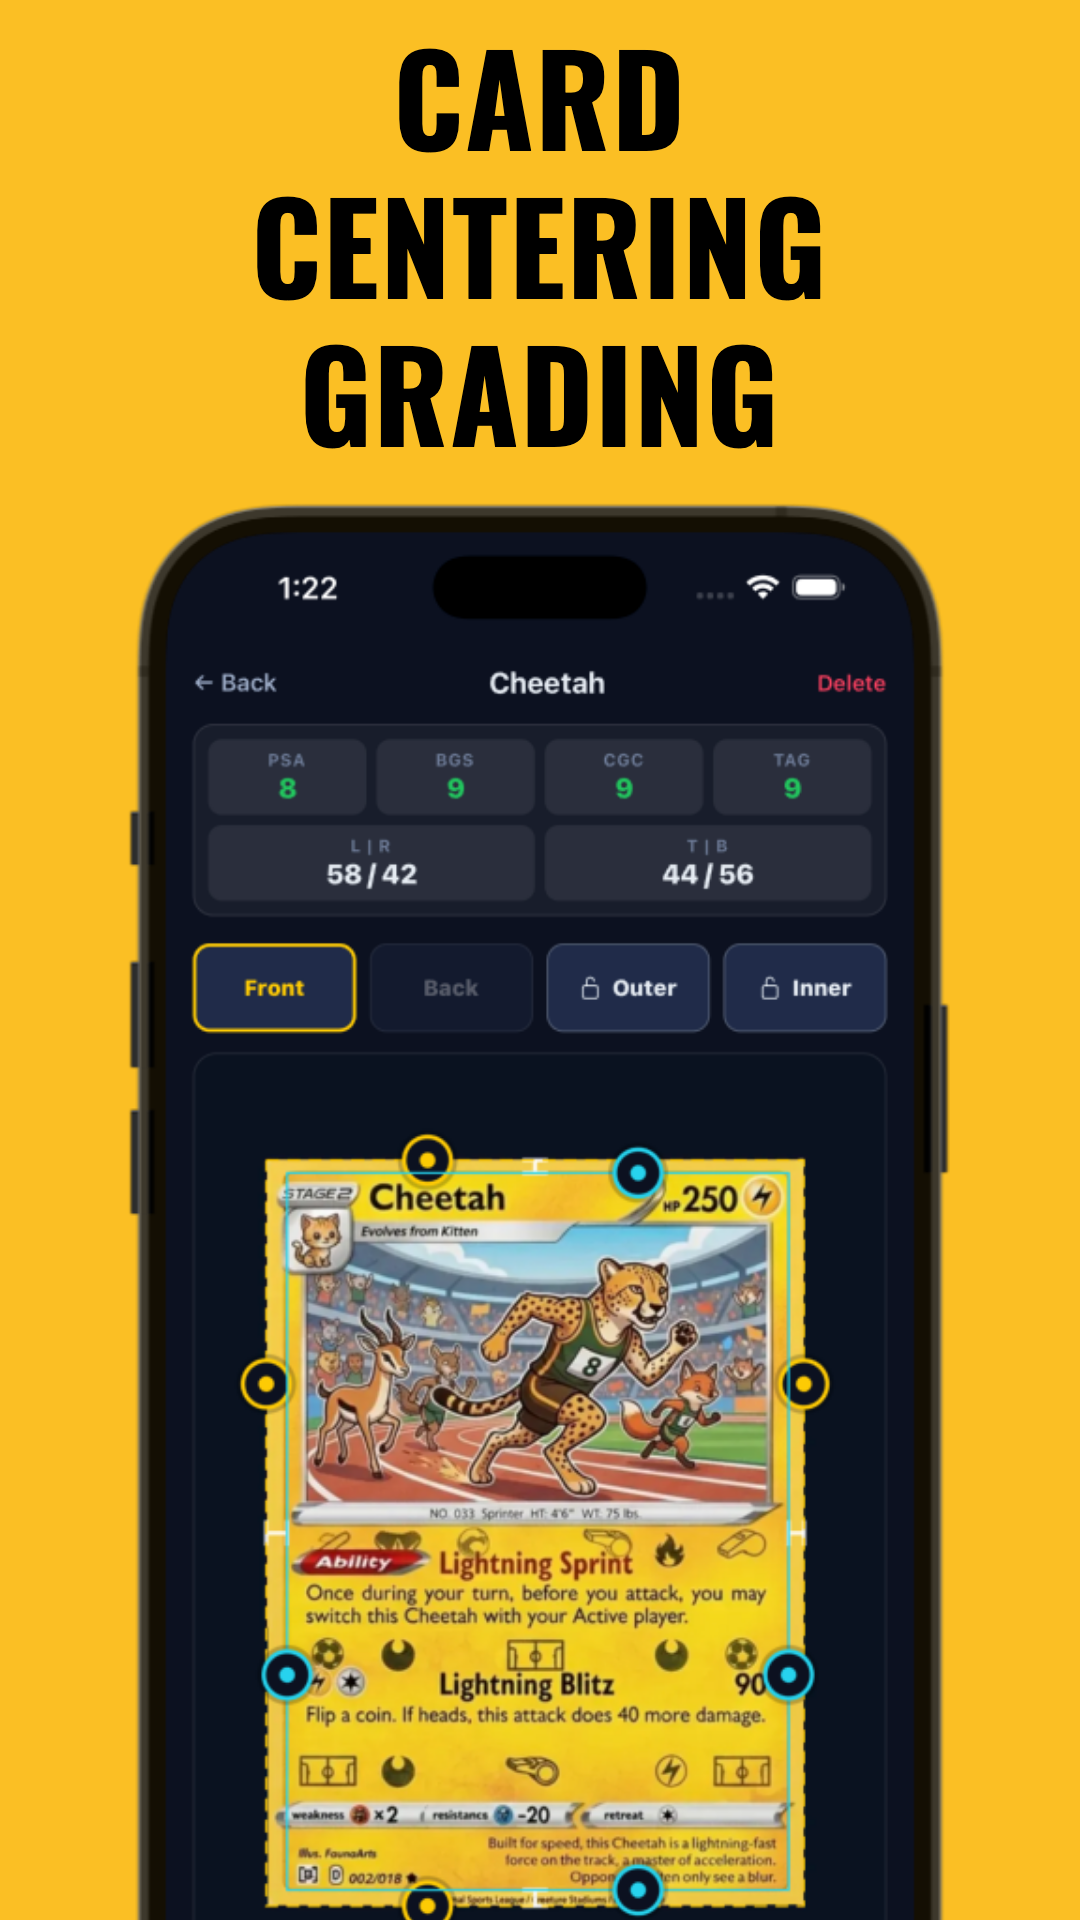
- Tools like Midpoint can estimate card grades more accurately with high-quality, glare-free images.
Table of Contents
- Section 1: Why Glare-Free Card Photography Matters
- Section 2: Lighting Fundamentals for No-Glare Card Photos
- Section 3: Camera and Phone Settings for Card Photography
- Section 4: Best Way to Scan Cards – Pros, Cons, and Tips
- Section 5: Card Centering Photo Tips for Grading Accuracy
- Section 6: Step-by-Step Guide: How to Take Pictures of Cards Without Glare
- Conclusion
- FAQ
Section 1: Why Glare-Free Card Photography Matters
The Role of Card Photos in the Grading Process
Whether you collect Pokémon, sports cards, or TCG, high-quality card photography is essential for accurate grading. Companies like PSA, BGS, CGC, and TAG evaluate physical features such as centering, corners, surface, and edges. Glare and reflections can obscure these key details, leading to incorrect assessments or costly resubmissions. For example, if a photo has a bright glare across the border, a grader (or an automated tool like Midpoint) might not be able to discern the true card centering or spot subtle surface defects, resulting in a possible lower grade or an unnecessary rejection. This challenge becomes even more critical as modern grading increasingly relies on digital submissions and pre-grading tools that analyze images before cards are physically reviewed.
Common Problems Caused by Glare
- Obscured Centering: Glare can hide border edges, making centering impossible to measure by eye or with digital tools. Even a small hotspot on a border can throw off centering analysis by several percentage points, which may mean the difference between a PSA 10 and a PSA 9.
- Surface Imperfections: Reflections often mask scratches, print lines, or surface wear, causing inaccurate grading predictions. Some surface flaws, like faint print lines or micro-scratches, are only visible under certain angles and lighting—strong glare will render these completely invisible in a photo.
- Color Distortion: Photos with glare may misrepresent card colors, making flaws or fading harder to spot. For instance, a holographic card photographed with glare may appear washed out or have colors that don’t match the actual card, misleading both buyers and graders.
Why Collectors and Sellers Must Master No-Glare Photography
If you’re prepping to submit cards for grading, or selling high-value collectibles online, mastering how to photograph cards without glare pays off in several ways:
- Ensures that centering tools (like Midpoint) analyze images accurately. A single clean photo can be the difference between a precise grade estimate and a costly surprise.
- Protects your investment by revealing true card condition before spending $30+ on grading. Identifying surface flaws or centering issues early means you can choose whether to submit, sell raw, or seek a replacement.
- Builds buyer trust by showcasing cards’ real qualities in sales listings. Clear, glare-free images help you stand out on marketplaces, leading to faster sales and fewer returns.
Ultimately, mastering no-glare photography isn't just about aesthetics—it's about accuracy, transparency, and maximizing the value of your collection. It’s a skill that pays for itself every time you avoid a grading mishap or earn a buyer’s confidence.
Section 2: Lighting Fundamentals for No-Glare Card Photos
Understanding Light Sources
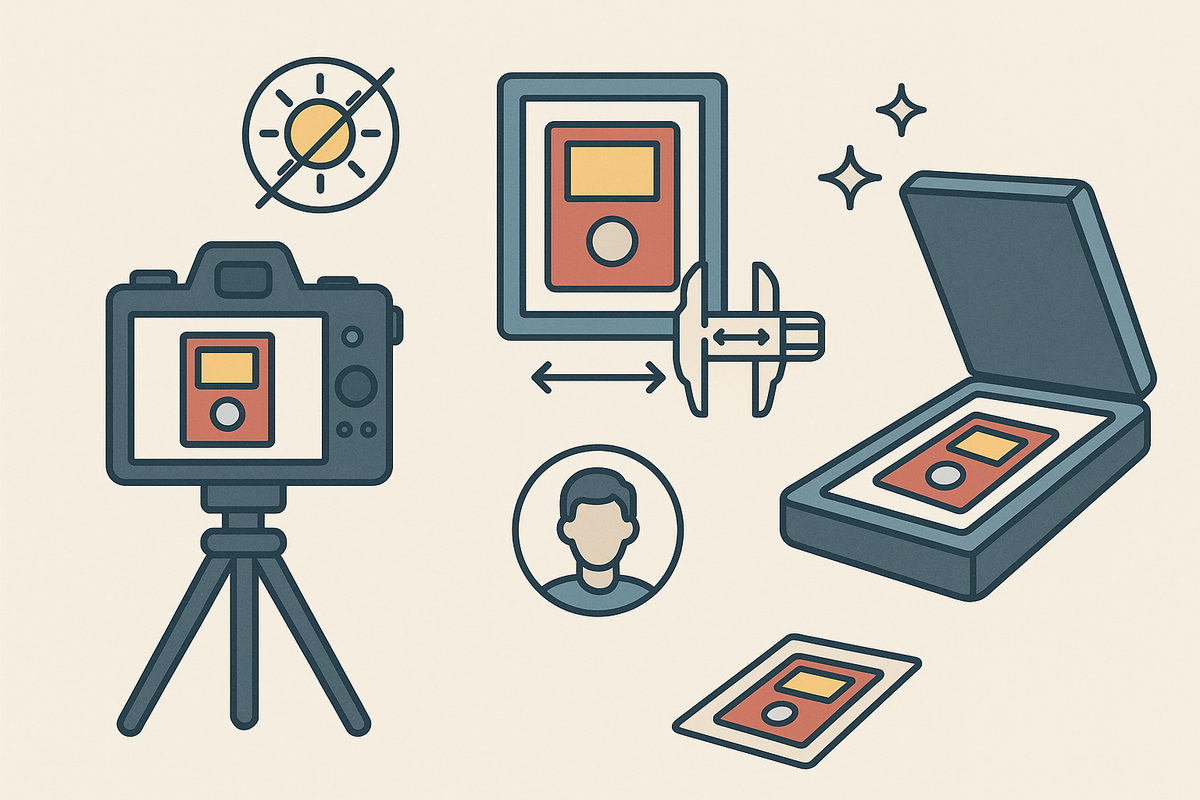
Lighting is the single biggest factor in eliminating glare from card photos. Overhead light, direct sunlight, and harsh LEDs all produce strong reflections. Diffused, indirect lighting is ideal for card photography with no glare. Think of the card’s surface as a tiny mirror: any small, bright point of light will show up as a reflection. Spreading the light over a larger area with soft diffusion prevents this. The larger and more diffuse your light source, the lower the chance of sharp glare spots ruining your photo.
Types of Lighting to Avoid
- Direct Overhead Lights: Ceiling fixtures and lamps pointed straight down create hotspots and mirror-like glare, especially on glossy cards or those with foil finishes.
- Sunlight through Windows: Natural light can be beautiful, but midday sun is too harsh and unpredictable. Sunbeams can move as clouds pass, introducing inconsistent reflections and color shifts in the middle of a shoot.
- Camera Flash: Built-in flashes produce sharp reflections and wash out detail. Even external flashes can cause problems unless diffused or bounced carefully.
Best Lighting Setups for Card Photography
- Softboxes or Diffusers: Place a softbox or a white bedsheet between the light source and your card to scatter light evenly. Even a basic 16-24 inch softbox with an LED bulb can produce professional-looking results at home. Place the softbox at about 18–24 inches from the card, angled to one side, and check for any remaining reflections before shooting.
- Desk Lamps at Angles: Position two lamps at 45-degree angles from either side to minimize direct reflection and balance shadows. Ideally, use bulbs with a color temperature around 5000K (daylight) for neutral color reproduction. If possible, choose lamps with adjustable heads so you can fine-tune the angle and avoid direct hotspots.
- Natural Light (Indirect): Shoot during early morning or late afternoon, near a window with sheer curtains for soft, even illumination. Avoid placing the card in a sunbeam. Instead, let the ambient light fill the room—this produces even, shadow-free lighting with minimal risk of glare.
DIY Diffusion Techniques
If you don’t own professional lighting, create a diffuser by taping white parchment paper or frosted plastic over a lamp. Even a lampshade can help. The goal: spread the light so no single point is reflected in the card’s glossy surface. Other DIY options include using a white pillowcase, shower curtain, or even a translucent plastic storage bin as a light tent. For example, you can cut a window in a cardboard box, cover it with white fabric, and place your lamp outside the box—this creates a cheap and effective mini-studio for card photography. Always test your setup by moving the card and observing where reflections appear, then adjust your diffusers as needed.
Another tip: try bouncing light off a white wall or ceiling rather than pointing it directly at your card. This indirect lighting is naturally diffused and far less likely to cause glare. If your lamps are too bright, dim them or move them farther away, and use a white board or sheet to reflect additional light onto shadowed areas.
Section 3: Camera and Phone Settings for Card Photography
Choosing the Right Camera
Modern smartphones can rival traditional cameras for card photography. Both options have pros and cons:
- Smartphones: Convenient, easy to adjust, with high-resolution sensors. Most flagship phones from the last 3–4 years offer 12MP or higher, which is more than enough for clear card photos. Apps like ProCamera (iOS) or Open Camera (Android) give you manual control if you want to fine-tune settings.
- DSLRs/Mirrorless: Superior manual controls, macro lenses for ultra-sharp detail. A basic DSLR with a 50mm or 60mm macro lens allows for sharp focus across the entire card, and manual settings let you dial in exposure, white balance, and focus precisely. If you already own such a camera, it’s worth using for your most valuable cards or when submitting images for grading analysis.
Key Settings for No-Glare Photos
- Turn Flash Off: Always disable the flash to prevent harsh glare spots. Even "auto-flash" modes can fire unexpectedly, so set flash to "off" in your camera app or menu.
- Use HDR Mode: High Dynamic Range (HDR) helps balance shadows and highlights for true-to-life detail. If your phone’s camera app offers HDR, enable it—this is especially helpful for cards with both dark and light areas, such as those with foil or holographic elements.
- Focus Manually: Tap to focus (on phones) or use manual focus (on cameras) to ensure the card’s surface is crisp edge-to-edge. Some phones allow you to lock focus by long-pressing the screen; on cameras, use live view and zoom in to fine-tune focus on the card’s text or border.
- Adjust Exposure: Lower the exposure slightly for dark or reflective cards to prevent blown-out highlights. On phones, tap the card and slide your finger up or down to adjust brightness. On cameras, use exposure compensation (-0.3 or -0.7 EV is a good starting point) for cards that tend to reflect a lot of light.
Stabilization and Consistency
- Tripod Use: Even a cheap tabletop tripod eliminates blur and keeps framing consistent for batch photos. For phones, use a clamp mount or flexible tripod. For cameras, use a sturdy tripod and a remote trigger.
- Timer or Remote: Use a 2-second timer or remote shutter to avoid camera shake when pressing the button. This is especially important when shooting at slower shutter speeds (1/30–1/60) under softer lighting conditions.
Consider marking a spot on your table or floor to maintain the same camera position for every card. This consistency is vital for comparing centering or surface quality across multiple cards, and it speeds up batch photography for large collections. Some collectors even build simple photo jigs from cardboard or foam board to hold the card and camera in perfect alignment for every shot.
Remember, a clear, sharp photo is critical for card centering photo tips—especially if you plan to use digital centering tools or send images to grading services for pre-grading estimation. Take test shots and review them at full size on a computer before photographing your entire batch. Look for any soft focus, color shifts, or glare, and tweak your settings as needed. Don’t rely solely on your phone’s screen for judging sharpness; always zoom in to inspect fine details.
Section 4: Best Way to Scan Cards – Pros, Cons, and Tips
Flatbed Scanners vs. Cameras
Scanning is often the best way to scan cards for no-glare, high-resolution images. Let’s compare scanning and photography:
- Flatbed Scanners: Eliminate glare by using even light from below the glass. Scanners like the Epson V600 or Canon LiDE series produce detailed, perfectly flat scans with no distortion. This makes them ideal for centering analysis and digital grading tools. Scanners also allow you to process multiple cards at once by placing several on the bed (with space between them), saving time for large collections.
- Cameras: Offer flexibility, but are prone to reflections and uneven lighting. However, they’re faster for quick shots or for cards in slabbed holders that don’t fit on a scanner. Cameras also let you shoot cards in top loaders, snap quick photos for sales listings, or capture angled shots to highlight certain features.
Scanner Settings for Card Photography
- Resolution: Scan at 600 DPI or higher for detailed images suitable for centering analysis. Scanning at 1200 DPI can be useful for tiny details, but files will be much larger and not always necessary unless you’re analyzing micro-flaws. For most grading purposes, 600 DPI is a sweet spot.
- Color Mode: Use full-color, 24-bit mode to capture accurate card details. Avoid grayscale or black-and-white modes, as these can wash out subtle color variations that matter for surface and edge analysis.
- File Format: Save images as PNG or TIFF to avoid compression artifacts that can obscure borders or surface flaws. JPEGs are smaller but can introduce blurring or color banding, especially if saved at lower quality.
Tips for Scanning Cards Safely
- Clean the Glass: Wipe the scanner bed before use to prevent dust or smudges that look like card defects. Even a tiny speck of dust can appear as a print line or surface flaw in the scan, misleading grading tools or human reviewers.
- Card Placement: Lay cards flat but do not press down; avoid damaging corners or edges. Some scanners apply slight pressure as the lid closes; use a soft cloth or piece of foam to cushion the lid if needed. Never force a thick holder or slab onto the glass, as this can damage both the card and the scanner.
- Handling Sleeves: If possible, scan cards outside of sleeves for best results, but only if safe—otherwise use clean, new sleeves to minimize extra glare from scratches. Scratched or dirty sleeves can create false surface defects in the scan, so always check for cleanliness. For high-value cards, use powder-free gloves when handling raw cards to avoid fingerprints.
Scanned images are especially effective when evaluating centering, as borders appear sharp and undistorted. Tools like Midpoint can process these scans to estimate grades before you submit to PSA or BGS, saving money and time. For more details on centering analysis, see the guide on how to measure card centering.
If you’re scanning slabs or top loaders, note that thick plastic can add reflections or optical distortions. Some collectors use anti-reflective glass or specialty sleeves designed for scanning to minimize these effects. Always experiment with a test scan before batch scanning valuable cards.
Section 5: Card Centering Photo Tips for Grading Accuracy
Understanding Card Centering Requirements
Card grading companies deduct points for off-center cards. A card with 60/40 centering might get a PSA 9, but a 70/30 card could drop to 8 or lower. Accurate centering measurement depends on glare-free, undistorted photos. For example, PSA’s standards for a Gem Mint (10) require that centering be no worse than 55/45 on the front and 75/25 on the back. BGS and CGC have similar requirements, and even small deviations can mean a full grade difference. This is why clarity and geometric accuracy in your photos are so important: a distorted or glared image could make a perfectly centered card appear off, or vice versa.
Essential Photo Tips for Centering Analysis
- Shoot Straight On: Hold the camera or phone directly above the card—avoid tilting to prevent skewed borders. Use the grid overlay in your camera app, if available, to ensure the card’s edges are parallel to the frame.
- Fill the Frame: Get close so the card fills the image, but leave a small margin to avoid cropping edges. A 1/8" (3mm) border around the card in the photo is usually enough to show the full card without risking accidental cropping or shadowing at the edges.
- Include a Ruler or Reference: For manual analysis, placing a ruler beside the card can help check millimeter precision. Digital grading tools may also use this reference to calibrate measurements, especially if the card is photographed at an angle or partially cropped.
- Consistent Background: Use a plain, contrasting background (black, white, or gray) to make borders stand out. This aids both the human eye and computer vision algorithms in detecting the card’s edges cleanly, even on cards with colored or patterned borders.
Common Mistakes That Impact Centering Results
- Angled Shots: Photos taken from the side distort card proportions and centering measurements. Even a slight tilt (5–10 degrees) can skew the apparent width of borders by several percent, easily pushing a card from 60/40 to 70/30 visually.
- Busy Backgrounds: Patterns or reflections behind the card confuse both human eyes and digital grading tools. Avoid wood grain, fabric textures, or reflective surfaces—these can create false edges or shadows that interfere with centering analysis.
- Low-Resolution Images: Blurry or pixelated photos make it impossible to measure borders or spot flaws. Always shoot at the highest available resolution, and avoid digital zoom, which reduces image sharpness.
For a deeper dive into why centering matters and how to improve your grades, check out how centering impacts card value. Always use high-quality, no-glare photos for both visual checks and digital tools—this is the foundation of accurate pre-grading. If you’re photographing many cards, consider building a simple jig or template to hold each card in the same position and orientation for every shot. This reduces user error and improves the reliability of automated centering analysis.
Remember, even small mistakes in photo technique can have a major impact on grading results. Take your time, double-check your setup, and don’t be afraid to reshoot if you spot glare or distortion in your images. Perfecting your workflow now will pay off every time you submit cards for grading or sell online.
Section 6: Step-by-Step Guide: How to Take Pictures of Cards Without Glare
Step 1: Set Up Your Workspace
- Choose a clean, flat surface near a window or under soft, artificial lighting. Avoid cluttered or reflective tables—matte black, white, or gray poster board works well as a base.
- Lay out a plain background (matte black or white paper). This makes card edges stand out and helps digital tools recognize borders accurately.
- Gather your camera/phone, tripod, and any diffusers or lamps. If you don’t have a tripod, use a stack of books to steady your hands and keep the camera parallel to the card.
Step 2: Position the Lighting
- Set up two desk lamps at 45-degree angles, or use a large softbox for even, diffused light. For best results, place lamps about 12–18 inches (30–45cm) from the card and adjust until the surface is evenly lit without hot spots.
- Test lighting by holding a card flat and moving it; adjust until no bright spots or reflections appear on the surface. Check for glare by tilting the card slightly while watching under your camera’s live view or phone screen—move lamps as needed to eliminate all reflections.
- If using natural light, wait for overcast weather or diffuse sunlight with a curtain. Avoid direct sunbeams, which move quickly and can cause inconsistent lighting between shots.
Step 3: Prepare the Card
- Wipe the card gently with a microfiber cloth to remove dust and fingerprints. If handling high-value cards, consider wearing clean, lint-free gloves to prevent accidental smudges or oils transferring to the card.
- If photographing out of a sleeve, handle only by the edges. If sleeved, use a clean, new sleeve to minimize additional glare. Inspect the sleeve for scratches or cloudiness, as these can show up in photos and mimic card surface flaws.
Step 4: Camera Setup and Composition
- Mount your camera or phone on a tripod directly above the card, lens parallel to the surface. Use a bubble level or your camera’s grid lines to ensure the setup is perfectly perpendicular, avoiding perspective distortion.
- Frame the shot so the card fills the image without cropping any borders. Leave a small margin around the card to make sure no edges are cut off and to help with digital cropping later.
- Tap to focus or use manual focus for maximum detail. On cameras, use live view and zoom in to confirm sharpness at the card’s edges and center.
- Disable flash, enable HDR, and set a timer or remote shutter to avoid blur. If your device allows, shoot in RAW format for maximum editing flexibility.
Step 5: Capture and Review
- Take several shots from the same angle, adjusting exposure as needed for true-to-life color. If the card is holographic or foil, try slightly different angles to catch the best representation without losing detail to glare.
- Check images for glare, focus, and sharpness on a larger screen before moving on. Zoom in to inspect borders, corners, and surface for clarity. Delete any blurry or glared images immediately to avoid confusion later.
- Repeat for the card back if submitting for grading or detailed analysis. Grading companies consider both sides, and centering or flaws on the back can affect the final grade.
Step 6: Optional – Scan Your Card
- If you have a flatbed scanner, scan the card at 600 DPI or higher for the most precise, no-glare image possible. Place the card straight and flat on the scanner, close the lid gently, and use the scanner's preview function to ensure the card is framed correctly.
Once you have high-quality, glare-free images, upload them to a card centering tool like Midpoint to get instant centering and grading estimates before submitting to PSA, BGS, CGC, or TAG. For step-by-step pre-grading help, see this pre-grade your card guide.
Don’t forget to save original, unedited copies of your photos or scans. Many grading services ask for high-resolution images if there are disputes, or for record keeping. Keeping well-organized image files with clear naming conventions (e.g., CardName_Front_Date.jpg) also helps you track submissions and sales over time.
Conclusion
Mastering how to take pictures of cards without glare is an essential skill for every card collector and seller. By understanding lighting, camera settings, and the best way to scan cards, you can produce crystal-clear images that accurately represent your collection. These no-glare photos are key for card centering analysis, pre-grading, and maximizing card value—whether using advanced tools like Midpoint or submitting to grading companies directly. Invest a little time in perfecting your card photography setup, and you’ll save money, avoid grading surprises, and showcase your cards at their true best.
Remember, the difference between a $100 card and a $500 card can come down to a subtle flaw or centering issue that’s only visible with the right photo. Take the time to experiment with your lighting and camera settings, and don’t settle for "good enough" images. Seek feedback from other collectors or online communities—sometimes another pair of eyes can spot a flaw or improvement you missed. Over time, you’ll develop a workflow that lets you document, grade, and sell your collection with confidence and professionalism.
FAQ
Q: What is the best lighting for no-glare card photography?
A: Use diffused, indirect lighting—softboxes, lamps with a white diffuser, or natural light filtered through curtains. Avoid direct overhead or flash. For the most consistent results, position your light sources at 45-degree angles and always check for glare by moving the card slightly before taking the photo.
Q: Can I scan cards in sleeves?
A: Yes, but for sharpest results, scan without sleeves if the card is safe to handle. If not, use a clean, unscratched sleeve to reduce extra glare from sleeve marks. Avoid scanning in old or dirty sleeves, as scratches or fogging can mimic surface flaws.
Q: Why do my card photos still have glare even with diffused light?
A: Check the angle: tilt the card or camera slightly until the reflection disappears. Also, ensure there are no bright direct light sources in the room. Try repositioning your lamps or adding more diffusion material. Sometimes, even a small shiny object nearby (like a phone or metallic tool) can reflect light back onto the card.
Q: Are smartphones good enough for card photography without glare?
A: Modern smartphones work very well if you use the right lighting, disable flash, and focus carefully. A tripod improves sharpness and consistency. For difficult cards, try manual camera apps to control exposure and focus more precisely. Always review images at full resolution before submitting for grading or sales.
Para elegir una prenda vinculada a un club, la información sobre tallas y materiales ayuda a evitar decisiones apresuradas. Una referencia como tienda de camisetas del AC Milan puede servir para revisar opciones generales sin depender de una sola característica. También conviene revisar las condiciones descritas para evitar confundir estilo, talla y comodidad.
Q: Should I photograph or scan my cards for grading?
A: Scanning offers the most consistent, glare-free results. High-quality photos, however, are also suitable if lighting and technique are correct. Use scans for centering and surface analysis, and photos for capturing cards in holders or for quick sales listings. If in doubt, do both and compare the results before submitting to grading services or using digital analysis tools.
Free to start
Try the Midpoint app
Grade any card from a photo, see its raw and PSA 10 value, and track what your collection is worth — free.
Get it on iPhoneGet it on Android