How to Build Your Own Card Centering Guide: Step-by-Step DIY Jig for Perfect Alignment
Learn how to build your own card centering guide for perfect alignment in paper crafting. This DIY jig helps achieve balanced, professional-looking designs.
Estimated reading time: 7 minutes
Key Takeaways
- Creating a custom card centering guide ensures consistent margins and professional-looking projects.
- You can build an affordable, durable alignment jig with basic crafting materials and tools.
- Step-by-step instructions cover planning sizes, cutting, marking crosshairs, and adding outlines.
- Optional upgrades include clear overlays, color-coded outlines, and non-slip features.
- Troubleshooting tips help maintain accuracy and prevent shifting during use.
Table of Contents
- Understanding Card Centering
- Materials and Tools Required
- Step-by-Step Guide to Building Your Own Card Centering Tool
- Customization and Troubleshooting
- Tips for Accurate Card Centering
- FAQ
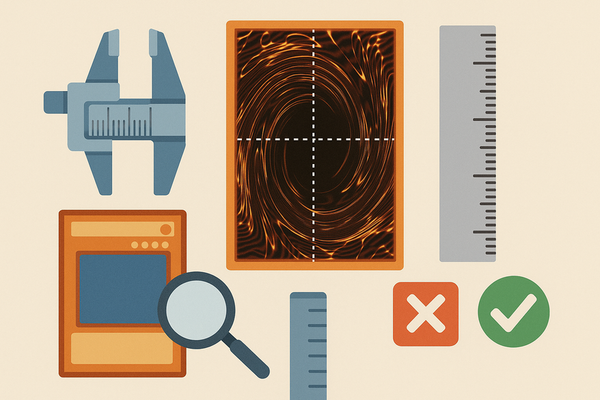
Understanding Card Centering
What Is Card Centering?
Card centering means placing a card panel or photo so that its borders are the same width on all sides. This symmetry enhances balance and draws attention to your focal image rather than minor misalignments. In both crafting and trading-card grading, measured equal margins result in a polished appearance. For more on manual measurement techniques, see our detailed measurement guide.
Why Even Borders Matter
- Balanced design draws the eye to the main element.
- Symmetry gives a polished, professional look.
- Uneven spacing—even 1 mm off—can make a card look crooked.
- Consistent alignment helps when layering panels or mats.
Common Challenges Without a Jig
- Eyeballing placement leads to guesswork.
- Pencil guidelines need erasing, slowing you down.
- Repetitive measuring with rulers can damage surfaces.
By choosing to build your own card centering guide, you remove guesswork and ensure consistency.
While this DIY jig gives hands-on control, you can also use the Card Centering Tool to measure centering precisely and get instant estimates before grading.
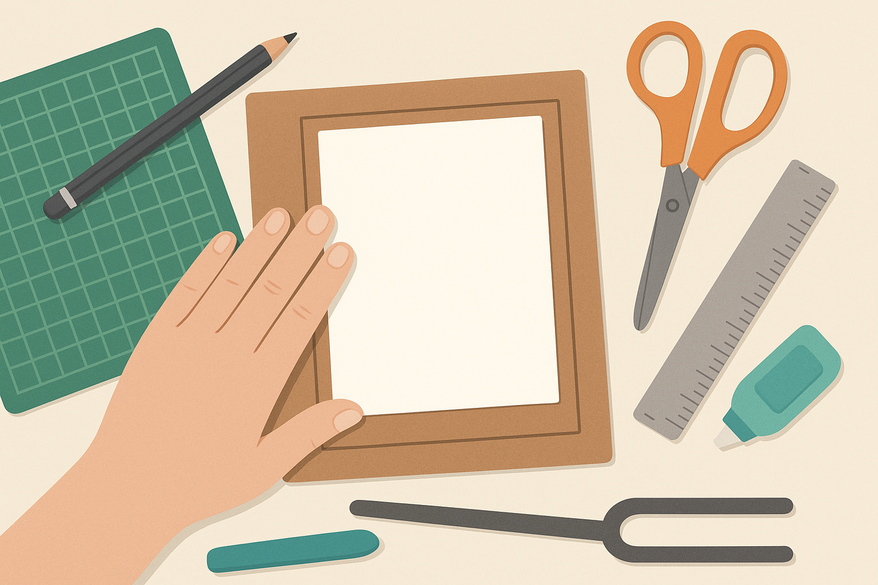
Materials and Tools Required
Core Materials
- Base material (cardboard, chipboard, or plastic sheet)
- Ruler with millimeter or 1/16″ markings
- Pencil and fine-tip permanent marker
- Craft knife and cutting mat
- Adhesive (double-sided tape or PVA glue)
Optional Upgrades
- Acetate overlay or laminating film
- Low-tack tape or removable adhesive dots
- Corner-rounder punch for safe edges
- Non-slip dots or washi tape for stability
- Colored markers for distinct outlines
Sourcing Tips & Safety
- Repurpose packaging boxes and offcut plastic.
- Find affordable rulers and glue at dollar stores.
- Use old cutting mats as a durable base.
- Always cut away from yourself and use sharp blades safely.
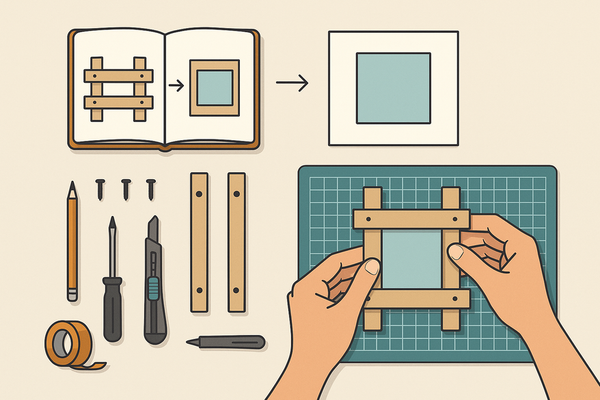
Step-by-Step Guide to Building Your Own Card Centering Tool
Step 1: Plan Your Sizes and Layout
- List your common card bases and panels (e.g., A2 at 4.25″×5.5″ with a panel of 4″×5.25″).
- Create a chart in a notebook or spreadsheet for quick reference.
- Include specialty sizes like invitations, tags, or mini cards.
Step 2: Cut the Base
- Measure and mark a rectangle at least 1″ larger than your biggest card.
- Cut the base on a mat with a craft knife.
- Test-fit your largest card to confirm the center area.
Step 3: Draw a Center Crosshair
- Measure half the width and height to find the center.
- Draw vertical and horizontal lines to form a crosshair.
- Verify measurements, then ink the lines with a marker.
Step 4: Mark Common Card Base Outlines
- Align each card base on the crosshair and trace in pencil.
- Verify equal borders, then outline and label each size.
- Use different colors or line styles to distinguish sizes.
Step 5: Add Panel-Centering Guides
- Measure half the panel width and height from the crosshair to locate corners.
- Connect points to form each panel outline and label accordingly.
- Use dashed lines for panels and solid lines for bases.
Step 6: Optional: Create a Clear Overlay
To align elements without marking your base, add a transparent layer. See this video demonstration.
- Cut acetate the same size as the base.
- Trace the crosshair and outlines on the acetate with a marker.
- Punch aligned holes and attach with a brad or ring.
Step 7: Finish and Protect Your Guide
- Ink all markings for visibility.
- Laminate or add clear tape to resist wear.
- Add non-slip pads or washi tape underneath.
- Round corners to prevent snags.
Customization and Troubleshooting
Customization Ideas
- Orient landscape on one side, portrait on the other.
- Color-code outlines: red for bases, blue for panels.
- Add a ¼″ or 0.5 cm grid for rule-of-thirds or offsets.
- Attach magnets or clips to hold cards in place.
- Mark “PHOTO” or “SENTIMENT” zones for quick layouts.
Troubleshooting Tips
- Redraw misaligned lines after re-measuring.
- Add non-slip pads if the jig shifts.
- Use darker markers or outline only corners for faint lines.
- Secure cards with removable tape or build a stop strip.
Tips for Accurate Card Centering
- Verify each card’s true center; factory cuts can vary.
- Work under bright, consistent lighting to reduce shadows.
- Check both horizontal and vertical margins separately.
- Dry-fit panels with light adhesive before final placement.
- Batch tasks: cut all panels, then align each in sequence.
- Add one-third grid marks for off-center or creative layouts.
FAQ
- How accurate can my DIY jig be? When built carefully with a precise ruler and fine markers, you can achieve sub-millimeter accuracy similar to professional tools.
- What materials are best for durability? Chipboard or repurposed plastic sheets resist warping and can be laminated for long-term use.
- Can I add more sizes later? Yes—simply measure new dimensions from the crosshair and add outlines in a new color.
- How do I maintain my centering guide? Wipe it clean, replace any faded markings, and re-laminate when needed to protect surfaces.
- Is this jig suitable for trading-card grading? While it’s great for crafts, professional grading often requires specialized digital tools for sub-millimeter precision.