Card Centering Analyzer Tutorial: A Step-by-Step Guide to Precise Trading Card Centering
Learn precise card centering analysis for trading cards. This tutorial guides you in using tools to measure centering, predict grades, and save on submissions.
10 min read
Key Takeaways
- Understand the purpose and significance of centering analysis for grading and trading.
- Prepare and configure your system with proper setup for web and mobile tools.
- Follow a detailed workflow from image capture to grade prediction using auto-detection and manual guides.
- Troubleshoot effectively with best practices for lighting, angles, and common fixes.
- Apply practical use cases in pre-grading, collection sorting, and physical overlay tools.
Table of Contents
- Overview of the Card Centering Analyzer
- Analyzer Setup
- Analyzer Interface
- Detailed Tutorial
- Troubleshooting and Best Practices
- Practical Use Cases
- Conclusion
- Additional Resources
Section 1: Overview of the Card Centering Analyzer
The card centering analyzer measures border widths and computes centering ratios, guiding your grading and trading decisions.
- Definition:
- Measures left vs. right and top vs. bottom borders
- Calculates ratios like 55/45, 60/40, or percentages
- Identifies which side limits your grade
- Significance for grading:
- Centering is a key subgrade for PSA, BGS, and CGC
- Off-center cards lose points even with perfect corners and surface
- Pre-analysis helps you choose the right grading company
- Significance for trading:
- Buyers avoid overpaying for off-center cards
- Sellers price raw cards fairly or focus submissions on high-potential cards
- Dealers can pre-screen large collections quickly
- Common tools and platforms:
- Web: CardGrade online centering calculator
- Mobile: Card Centering Calculator (iOS/Android)
- AI tools: Gradeon Card Centering & Grading Tool
- Physical: overlay rulers and plastic guides
Section 2: Analyzer Setup
A. System Requirements & Prerequisites
Prepare your system, device, and cards for accurate centering measurements.
- Web tool requirements:
- Modern browser (Chrome, Safari, Firefox, Edge) with JavaScript
- Camera access or upload capability
- Stable internet connection
- Mobile app requirements:
- Compatible iOS or Android device
- Camera permission granted
- Sufficient storage for images
- Card prep:
- Remove cards from sleeves or top loaders
- Use a flat, non-reflective, solid-color surface
- Employ even, diffused lighting
- Position camera at 90° directly above the card
- Include a margin around the card in the frame
For detailed photography guidelines, see the Trading Card Photography Guide.
B. Installation & Initial Configuration
Mobile app setup:
- Search for “Card Centering Calculator” in the App Store or Google Play
- Install and open the app
- Grant camera and photo library access
- Select grading companies (PSA, BGS, CGC, SGC, TAG, ACE)
- Set units (ratio or percent) and enable AI detection if available
Web tool setup:
- Open the CardGrade centering tool in your browser
- Review photo guidelines and sample images
- Optionally create an account to save history
For even faster and more precise centering checks, try Card Centering Tool, a web app that measures front and back centering with sub-millimeter precision and flags whether your card meets PSA, BGS, or CGC Gem Mint tolerances before you pay grading fees.
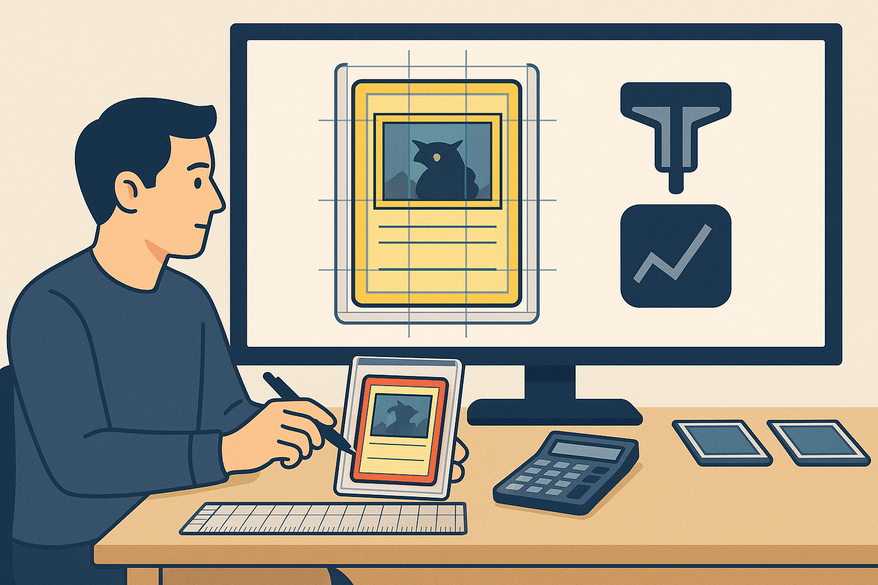
Section 3: Analyzer Interface
Explore the interface where you upload images, adjust guides, and read results.
- Image input area: “Upload Front,” “Upload Back,” or “Scan Card”
- Modes: AI auto-detection toggle vs. manual guide mode
- Measurement panel: left/right and top/bottom ratios
- Grading prediction panel: estimated centering grades
- Settings: sensitivity, zoom, grading company selection
- Help: tutorial access with photo tips and sample images
Layout differences:
- Mobile:
- Top toolbar (settings, help)
- Main preview with overlaid lines
- Numeric readout of ratios and grades
- Action buttons (retake, adjust, save)
- Web:
- Upload boxes for front/back images
- Photo guidelines and examples alongside
- Result box with centering ratios and grade impact
Section 4: Detailed Tutorial
Step 1: Prepare Card & Workspace
- Remove the card from any sleeve or top loader
- Lay it flat on a non-reflective, plain surface
- Ensure even, diffused lighting
- Position your camera directly above (90°)
- Fit the entire card in frame with some border
Step 2: Capture or Upload Images
- Tap “Upload Front” or “Scan Card” to capture the front side
- Repeat for the back side for full analysis
- Keep lighting and angle consistent
Step 3: Run Auto-detection
- Enable AI auto-detection
- The analyzer detects edges and places guides
- Computes initial ratios automatically
- Verify guides align with actual card borders
Step 4: Manual Guide Adjustment
- Switch to manual mode if needed
- Drag vertical lines to left and right borders
- Drag horizontal lines to top and bottom edges
- Use zoom for precise placement
Step 5: Interpret Centering Ratios
- View left/right and top/bottom ratios (e.g., 60/40)
- Calculation: (side A ÷ total) × 100 = percent
- Example: left = 2 units, right = 3 units → 60/40 ratio
Step 6: Review Grading Predictions
- See likely centering grades for each company
- Consult in-app standards guide for thresholds
- Use predictions to choose the best grading service
Step 7: Save, Export & Repeat
- Save measurements or export screenshots
- Retake photos or run multiple tests if results vary
- Consistency builds confidence
Section 5: Troubleshooting and Best Practices
Photo & Scanning Best Practices
- Use a solid, non-reflective background
- Remove cards from plastic holders
- Shoot directly from above at a 90° angle
- Avoid glare with diffused light
- Take multiple shots and choose the sharpest
Consistency Tips
- Verify auto-detected guides visually
- Run the analyzer multiple times on the same card
- Cross-check with a ruler or paper overlay
Common Errors & Fixes
- Reflection: remove the card from sleeves
- Angled photos: use a stand or tripod
- Poor lighting: add a diffuser or ring light
- Busy background: switch to a plain backdrop
Troubleshooting
- If auto-detect fails, switch to manual mode
- Update the app or clear your browser cache
- Contact support if crashes persist
Section 6: Practical Use Cases
Use Case 1: Pre-Grading a Sports Card
– Scan front/back and align guides
– Review centering ratios (e.g., front 60/40, back 65/35)
– Predict centering grade (e.g., PSA 9, BGS 9)
– Decide on submission vs. raw sale
Use Case 2: Sorting a TCG Collection
– Batch scan cards via mobile app
– Flag near 50/50 centering for submission
– Sell off-center cards at a fair raw price
Use Case 3: Physical Centering Tool
– Place the card behind a clear overlay ruler
– Read border measurements (e.g., left = 2 mm, right = 3 mm)
– Convert to a ratio using the printed scale
– Use the “green zone” to decide send vs. skip
Section 7: Conclusion
A systematic approach—proper setup, consistent photo technique, auto-detection checks, and multiple tests—enhances your grading success and trading confidence by:
- Measuring border widths precisely
- Computing and interpreting centering ratios
- Predicting grading outcomes for PSA, BGS, and CGC
- Making informed buy, sell, and submission decisions
Section 8: Additional Resources
- CardGrade Online Centering Tool
- Jade Lizard Card Centering Calculator
- Gradeon Card Centering & Grading Tool
- How to Use Legends Centering Ruler (video)
- Online Centering Tool Walkthrough (video)
- Physical Tool Demo (TikTok)
- Support & contact: see app store listings for developer email
FAQ
Q1: Do I need to measure both front & back?
A1: Yes; grading companies review both sides. The tool shows which side limits your grade.
Q2: Can I trust AI measurements?
A2: AI is reliable with good photos. Always verify guides and run tests for consistency.
Q3: How do I check centering without digital tools?
A3: Use a ruler, paper overlay, or visual eye-level comparison. Physical tools with printed scales are also available.
Q4: What centering do I need for PSA 10 or BGS 9.5?
A4: Each service has strict thresholds. Consult in-app standards or official grading guides.
Q5: Why do my results change between attempts?
A5: Small shifts in angle, lighting, or background can alter detection. Standardize your setup and retest for consistency.
Q6: Can all card types be analyzed?
A6: Most sports and TCG cards with clear borders are supported. Borderless cards may yield less accurate results.


