Card Centering Analyzer Tutorial: Your Complete User Guide
Learn to perfect card centering with this complete guide. The card centering analyzer tutorial covers essential steps for accurate submissions to grading companies.
Estimated reading time: 8 minutes
Key Takeaways
- The card centering analyzer offers sub-millimeter precision for border evaluation.
- Automates border detection and centering ratio calculations for PSA, BGS, CGC, SGC, TAG, and more.
- Includes a step-by-step guide for installation, image capture, analysis, and result interpretation.
- Advanced features such as AI auto-leveling, custom grading profiles, and exportable reports.
- Troubleshooting tips and best practices to ensure consistent, accurate measurements.
Table of Contents
- 1. Introduction
- 2. Understanding the Card Centering Analyzer
- 3. Getting Started
- 4. Step-By-Step Tutorial
- 5. Advanced Features & Best Practices
- 7. Conclusion
- 8. Additional Resources
1. Introduction
This comprehensive tutorial walks you through every step of measuring and perfecting card centering before submission. Accurate centering analysis matters because even slight off-center borders can drop a gem-mint grade to a lower tier. In modern grading, centering is one of the most critical factors that determine a card’s final grade.
This post serves as both a tutorial and a user guide for achieving gem-mint centering prior to submission to PSA, BGS, CGC, SGC, TAG, and other grading companies. You’ll find step-by-step instructions, advanced tips, troubleshooting advice, and a complete FAQ to master border evaluation.
For an automated analysis that delivers sub-millimeter precision, try Card Centering Tool to measure your cards before grading.
2. Understanding the Card Centering Analyzer
What Is a Card Centering Analyzer?
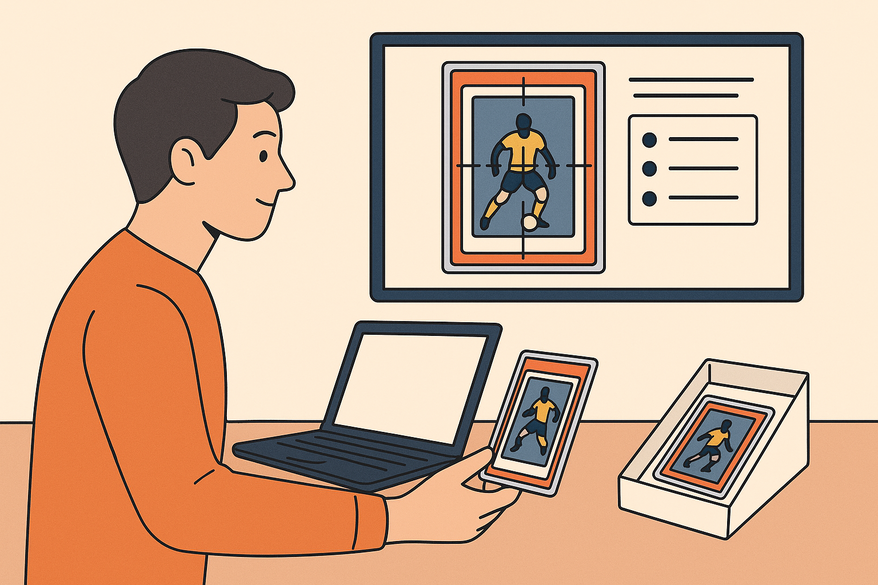
A card centering analyzer is a digital tool—available as a web app or mobile app—that measures border widths and computes centering ratios with precision. It automates edge detection and aligns border guides, providing objective centering percentages.
Core workflow:
- Import or scan a card image.
- Auto-detect borders using AI-powered edge finding.
- Calculate left/right and top/bottom centering ratios.
- Map results to major grading standards (PSA, BGS, CGC, SGC, TAG).
Key features include automatic border detection, manual adjustment tools, front & back side grading, and clear pass/fail signals for top-grade thresholds.
Common use cases:
- Pre-grading screening before PSA/BGS/CGC submissions
- Buying raw cards online or at shows
- Pricing and listing based on objective centering metrics
- Set building and personal collection curation
- Learning official centering standards
3. Getting Started
A. System & Hardware Requirements
To run the card centering analyzer smoothly, ensure you have:
- Device: Smartphone (iOS/Android) or computer with modern browser
- Camera: High-resolution for clear border capture
- OS/Browser: Up-to-date for cloud-based AI processing
- Internet: Stable connection
- Photo setup: flat non-reflective surface, diffused lighting, true 90° overhead angle
B. Interface Overview
Most analyzers feature a dashboard with “New Analysis,” image input controls (scan/upload), a measurement workspace with draggable guides and zoom, a results panel showing ratios and thresholds, and settings for detection sensitivity and grading standards.
C. Pre-Installation Steps
- Download mobile app or open the web tool
- Create or log in to your account if required
- Prepare your photo environment: flat surface, tripod or stand, consistent lighting
- Update to the latest version for current grading standards
4. Step-By-Step Tutorial
A. Installation
Mobile app: Search your app store for the centering analyzer, install, grant camera permissions, then log in. Web tool: Navigate to the analyzer URL, allow camera/file access, and optionally sign up for saved history.
B. Initiate Analysis
- Launch the tool and select “New Analysis” or “Scan Card”
- Choose front or back mode
- Select Camera Mode for live capture or Upload Mode for existing photos
C. Capturing/Importing Images
Place the card on a flat, non-reflective surface, remove sleeves, align the camera at 90° to avoid distortion, ensure even lighting, capture the full card with slight border margin, and repeat for the back side.
D. Applying Centering Techniques & Adjustments
- Auto-detect borders and review initial guides
- Use draggable guides and zoom/loupe for fine-tuning
- Correct image tilt by aligning guides with true card edges
- Save front and back measurements linked to the same card entry
E. Interpreting Results & Metrics
Left-right ratio and top-bottom ratio tell you bias; the stricter ratio determines the combined centering grade. Compare against PSA, BGS, CGC, SGC, and TAG mapping for pass/fail indicators.
F. Efficiency Tips
- Batch analyze similar cards in one session
- Retake photos when measurements vary
- Save analysis templates and settings for bulk work
5. Advanced Features & Best Practices
A. Advanced Functionalities
- AI auto-leveling and perspective correction
- Dual-side combined scoring
- Custom grading profiles
- Off-center visualization templates
- Export/PDF reporting for transparency
B. Best Practices for Accuracy
- Maintain consistent lighting, background, and camera angle
- Use high-resolution images
- Avoid reflections and shadows
- Measure both front and back sides
- Repeat measurements for high-value cards
C. Troubleshooting Common Issues
- Border detection errors → improve photo quality or use manual guides
- Variable results → stabilize camera angle and average multiple measurements
- Back side alignment issues → ensure full card view and correct mode
- Tool performance problems → update app/browser, close heavy apps, contact support
7. Conclusion
This card centering analyzer tutorial has covered everything from installation and image capture to advanced features, best practices, and troubleshooting. By following these steps, you can achieve consistent, objective centering measurements and improve your grading success. Experiment with different cards, compare analyzer results to actual slab grades, and integrate centering data into your inventory and pricing strategies.
8. Additional Resources
- Manual measurement techniques
- Centering tolerances compared
- Navigating the analyzer interface
- User Forums
FAQ
- Q1: Why use an analyzer vs. eyeballing?
A: Objective precision aligns more reliably with grading standards than visual estimation. - Q2: Do I need front & back measurements?
A: Yes, grading uses the worse side, so both must be measured for accurate prediction. - Q3: Guarantees on final grades?
A: The tool estimates centering only; final grades depend on surface, corners, edges, and grader discretion. - Q4: Supported card types?
A: Most sports and TCG cards with clear borders. - Q5: Thin or foil borders?
A: Manual tweaks and high-quality photos help with reflective or narrow edges. - Q6: Why do measurements vary?
A: Angle, lighting, and alignment changes affect results; aim for consistency. - Q7: Can I use seller photos?
A: Yes if quality and angle are sufficient; otherwise accuracy drops.


