Card Centering Analyzer Tutorial: The Complete User Guide for Perfect Trading Card Centering
Master trading card centering with our card centering analyzer tutorial. Learn setup, usage, and tips for grading-ready results every time.
Estimated reading time: 12 minutes
Key Takeaways
- Accurate centering ratios (e.g., 60/40) impact grading outcomes such as PSA 10 vs PSA 9.
- Proper setup: hardware, lighting, software or physical overlay, and background are essential.
- Step-by-step workflow for capturing, analyzing, and validating centering measurements.
- Troubleshoot issues like glare, auto-detection errors, and inconsistent readings.
- Advanced techniques: custom grading presets, scenario-based optimization, and worst-ratio strategy.
Table of Contents
- Section 1: Introduction and Overview
- Section 2: Getting Started (Prerequisites & Setup)
- Section 3: Understanding the Interface
- Section 4: Step-by-Step Tutorial
- Section 5: Troubleshooting Common Issues
- Section 6: Advanced Techniques and Optimization
- Section 7: Summary and Conclusion
- Section 8: Additional Resources
Section 1: Introduction and Overview
In this card centering analyzer tutorial, you will learn how to measure and perfect the border alignment of your trading cards. A card centering analyzer is a tool—whether an app, web-based calculator, or physical overlay—that measures border ratios used by major grading companies like PSA, BGS, CGC, SGC, and TAG.
Centering ratios such as 60/40 or 55/45 show how well the artwork sits within the card edges. A small shift can cost a full grade level (for example, a PSA 10 versus a PSA 9). This guide explains how centering ratios work and why one full grade step depends on a few millimeters of shift.
Lighting, background contrast, and card design can confuse auto-detection tools. A structured, step-by-step card centering analyzer tutorial helps you avoid errors from glare, textured surfaces, or unusual border styles. By the end of this card centering analyzer tutorial, you’ll have repeatable, reliable centering measurements for every submission.
For a deeper dive into manual measurement, see our How to Measure Card Centering guide.
For a seamless way to measure centering, be sure to try Card Centering Tool, a web app that calculates centering ratios and checks PSA, BGS, and CGC tolerances before you submit your cards for grading.
Section 2: Getting Started (Prerequisites & Setup)
2A. Prerequisites for App/Online Tool
- Hardware
– A smartphone, tablet, or computer with camera or image-upload support.
– Stable stand or tripod to hold your device steady. - Lighting
– Soft, diffused light with no harsh shadows or glare.
– Avoid direct overhead bulbs or shiny surfaces. - Software
– Install an iOS or Android centering app (e.g., Card Centering Calculator).
– Or open a web-based centering analyzer tool in your browser. - Card Specifications
– Use standard-sized trading cards (sports, TCGs, Pokémon).
– Ensure clear borders or defined frames around the artwork.
– Remove cards from sleeves, top loaders, or cases before scanning.
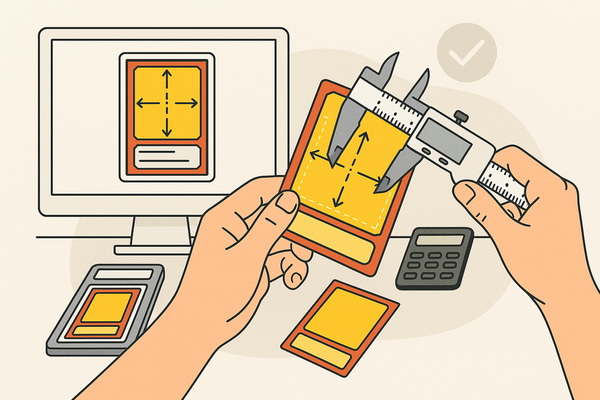
2B. Prerequisites for Physical Tool
- Tool
– A clear plastic overlay gauge with etched measurement lines. - Work Area
– A clean, flat, non-reflective surface with a contrasting background. - Cleaning Supplies
– A microfiber cloth to wipe dust and fingerprints from the card and gauge.
2C. Installation & Initial Configuration
- Download or access your centering analyzer tool.
– Install the card centering calculator app or launch the web version. - Grant Permissions
– Allow camera and photo library access for image scanning. - Configure Units & Profiles
– Choose percentage ratio mode (e.g., 60/40).
– Select target grading profiles (PSA, BGS, CGC, SGC, TAG). - Prepare Background
– Use solid white or black sheets under the card.
– Avoid wood grain, fabric textures, or patterned surfaces. - Final Check
– Verify that the card appears rectangular and fills most of the viewfinder.
Section 3: Understanding the Interface
In this card centering analyzer tutorial, understanding each part of the centering analyzer interface is crucial. For interface specifics, check our How to Navigate Centering Analyzer Interface guide.
- Main Capture/Upload Area
– Button to scan or upload the card’s front and back.
– Real-time camera preview with a detection box. - Detection & Measurement Overlay
– Draggable guide lines for left, right, top, and bottom borders.
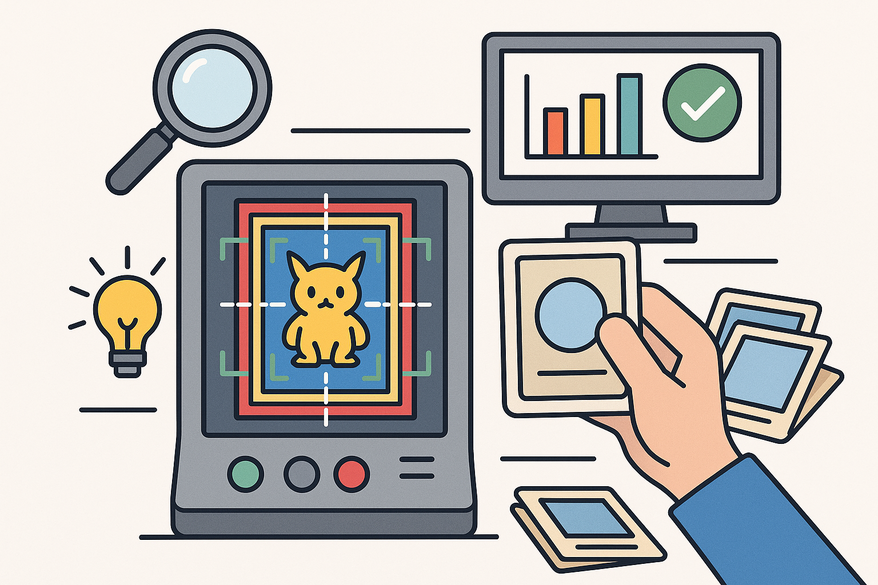
– Zoom loupe for pixel-level adjustment. - Centering Ratio Display
– Numeric readout: left/right and top/bottom percentages.
– Separate values for front and back views. - Grading Comparison Panel
– Estimated centering grades for PSA, BGS, CGC, SGC, TAG.
– Color-coded bands (green, yellow, red) for threshold ranges. - Advanced Settings
– Sensitivity slider for auto-detection.
– Save custom presets for different grading standards. - Help/Info Icons
– Tooltips explaining ratio calculations.
– Quick links to grading rules for each company.
Section 4: Step-by-Step Tutorial
4A. Preparation
- Remove the card from sleeves or top loaders to prevent reflections and edge distortion.
- Wipe the card surface and borders gently with a microfiber cloth.
- Set a solid, high-contrast background and diffuse your light source.
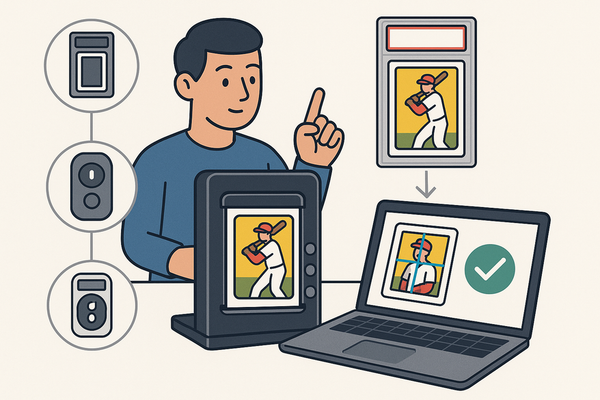
- Test the tool on a known centered card to confirm detection accuracy.
4B. Capturing & Analyzing
In this card centering analyzer tutorial, follow these actions for both front and back:
- Open the tool and choose “Scan” or “Upload Front.”
- Center the card in the viewfinder; keep the camera level.
- Confirm a bounding box appears around all edges.
- Capture or upload the image.
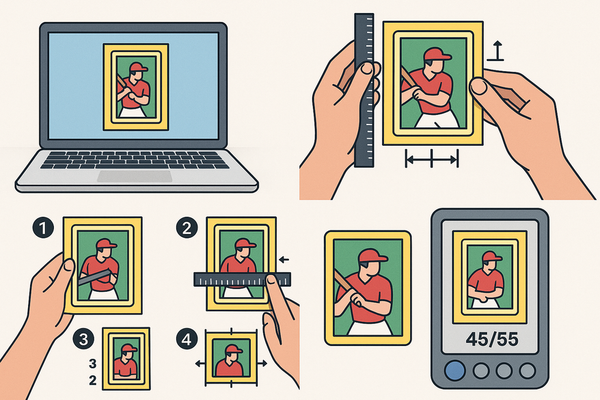
- Review auto-detected lines; drag handles to adjust guides if needed.
- Use the zoom loupe to refine pixel-precise placement.
- Read and record the ratios, for example 60/40 and 55/45.
- Compare ratios to grading thresholds (70/30 for mid-high grades, 60/40 for top grades) based on PSA vs BGS vs CGC centering tolerances compared.
- Repeat steps for the card back and view the combined verdict.
4C. Validation
- Use logos or text frames on the card as border references for accuracy.
- Avoid trapezoidal distortion by taking photos directly overhead.
- Perform a second scan to ensure consistent readings.
- If you have a physical gauge, compare its reading to your digital results.
4D. Tips & Tricks
- Choose a dark background for light-bordered cards and white for dark borders.
- Zoom in 3–5× when setting guide lines for best precision.
- Always use the worst ratio (left/right or top/bottom) for grade decisions.
- For borderless designs, align guides to inner frames or artwork edges.
Section 5: Troubleshooting Common Issues
- Issue 1: Flickering or No Detection
– Cause: Poor contrast, glare, or patterned background.
– Fix: Switch to a solid high-contrast sheet, remove sleeves, adjust lighting. - Issue 2: Auto-Detection Off by Pixels
Fix: Manually drag guides, use zoom loupe, or tweak sensitivity settings. - Issue 3: Inconsistent Readings
Fix: Use a tripod, keep camera angle consistent, take multiple scans. - Issue 4: Borderless or Complex Designs
Fix: Place guides on inner frames or text zones. Disable auto-detection if needed.
When to Seek Support: If problems persist, consult official docs or forums, or contact support via email or the app’s help center.
Section 6: Advanced Techniques and Optimization
Expert Features
- Auto-detection tuning for vintage vs modern cards.
- Create custom grading presets for PSA, BGS, CGC, SGC, TAG.
- Simulate off-center thresholds (e.g., 65/35, 75/25).
Scenario-Based Optimization
- Vintage sports cards: handle thicker, uneven borders with manual guides.
- Modern TCG cards: use game-specific presets for Pokémon, One Piece, Lorcana.
- Raw card workflows: scan new acquisitions to decide on grading.
Industry Tips
- Always use the worst centering measurement when submitting cards.
- Integrate centering checks into your full pre-grading routine (surface, corners, edges).
- Track your scan results against actual graded outcomes to refine your process.
Section 7: Summary and Conclusion
This card centering analyzer tutorial covered everything you need to get perfect border alignment:
- Preparation: card cleaning, background and lighting setup.
- Interface overview: capture area, measurement overlay, ratio display, grading panel.
- Step-by-step use: scanning, manual adjustments, ratio reading, front/back analysis.
- Validation and troubleshooting: glare fixes, manual tuning, consistent scans.
- Advanced tips: custom presets, vintage vs modern workflows, off-center simulation.
Using a centering analyzer boosts your grading confidence. You can pick the best cards to submit and choose the grading company that offers the highest potential grade. We welcome your feedback and questions in app reviews or community forums.
Section 8: Additional Resources
- Google Play Store – Card Centering Calculator app
- Apple App Store – Card Centering Calculator app
- Online Centering Tool – CardGrade Centering Analyzer
- Reddit PokeGrading Forum – Community tips
- Video Tutorials – Physical and digital workflows:
FAQ
- Do I have to remove the card from its sleeve?
Yes. Sleeves and top loaders introduce glare and disrupt border detection. Source: PriceCharting Card Centering Calculator. - Can I check front and back centering together?
Most tools let you upload both sides and will show which side limits your grade. Source: CardGrade Centering Tool. - How accurate is auto-detection?
With a clear background and good light, auto-detection is reliable, but always fine-tune manually. Source: CardGrade Centering Tool. - What centering ratio is “good enough” for top grades?
Aim for 60/40 or better for PSA 10 and similarly tight thresholds for other companies. Source: CardGrade Centering Tool. - How do I handle borderless cards?
Use internal frames or text boxes as guides to approximate center, and adjust lines manually. Source: YouTube Tutorial.