DIY Card Centering Techniques: Home vs. Professional Methods for Optimal Grading
Explore DIY card centering techniques to enhance grading results. Compare home methods with professional standards for maximizing your card's value and grading.
7-minute read
Key Takeaways
- DIY vs Professional: Home methods are cost-effective for bulk screening; professional grading offers unmatched precision for high-value cards.
- Range of DIY Tools: From rulers and overlays to AI-powered web apps, each technique balances speed, cost, and accuracy.
- Impact on ROI: Accurate pre-screening can save hundreds in submission fees by avoiding low-grade results.
- When to Outsource: Choose professional centering for borderless designs, borderline ratios, or auction-quality submissions.
- Best Practices: Consistent lighting, multiple measurements, and knowledge of grading thresholds (55/45, 60/40) improve DIY outcomes.
Table of Contents
- Background on Card Centering
- DIY Card Centering Techniques Overview
- Step-by-Step Example: Ruler/Caliper Method
- Common Challenges & Mistakes
- Professional Card Centering Techniques vs DIY
- Comparative Analysis
- Case Studies
- Situational Guidance
- Tips for Better Grading Outcomes
- Conclusion
- Additional Resources
- FAQ
Background on Card Centering
Card centering expresses how evenly the artwork sits within a card’s borders, typically represented as a ratio (for example, 55/45 or 60/40). Even flawless corners, edges, and surfaces can’t save a card that’s off-center—one small shift can drop a PSA 10 to a PSA 9 or lower, costing collectors hundreds or thousands of dollars.
- A 55/45 reading means one border is 55% of the total frame thickness and the opposite border is 45%.
- Grading houses treat centering as a core subgrade alongside corners, edges, and surface.
- For a detailed step-by-step guide to manual and automated measurements, check out this resource.
DIY Card Centering Techniques Overview
Collectors rely on six popular DIY methods—each involves specific tools, steps, pros, cons, and common pitfalls.
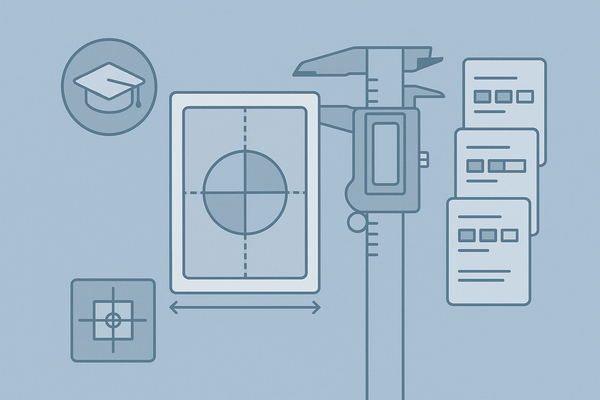
1. Ruler/Caliper Method
- Tools: Millimeter ruler or digital calipers.
- Steps:
- Place card on a flat surface.
- Measure left and right border thickness in mm.
- Compute each border ÷ total × 100 to get percentages.
- Repeat for top/bottom borders.
- Pros: Low cost; no software required.
- Cons: Human positioning errors; uneven print frames can skew results.
- Source: CenterGrade guide
2. Printed/Plastic Overlay Grids
- Tools: Transparent overlay with grid or ratio markings.
- Steps:
- Align overlay edges to card borders.
- Read alignment against the grid.
- Pros: Fast for bulk sorting; reusable.
- Cons: Tilting or warping introduces error.
- Source: CenterGrade guide
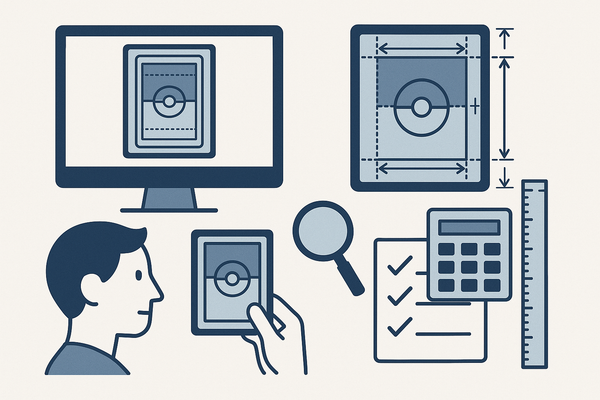
3. Phone/Computer Grid Templates
- Tools: Smartphone camera grid or web-based centering tool.
- Steps:
- Enable grid in camera app or open online grid tool.
- Align card borders to grid lines.
- Pros: More precise than eyeballing; mobile.
- Cons: Lens distortion and angle errors.
- Source: YouTube walkthrough
4. Pixel-Counting/Digital Measurement
- Tools: High-res scanner/camera and image-editing software (e.g., Photoshop, GIMP).
- Steps:
- Scan or photo at high resolution.
- Measure pixel distance from artwork to each edge.
- Convert pixel counts into percentages.
- Pros: High precision with clear images.
- Cons: Requires software skills; scaling issues possible.
- Source: Video tutorial
5. AI-Powered DIY Tools
- Tools: Online services like CenterGrade.
- Steps:
- Upload a clear, flat card image.
- AI detects borders and returns centering percentages.
- Pros: Fast, objective, minimal bias.
- Cons: Dependent on photo quality.
- Source: CenterGrade guide
6. Eyeball Test
- Tools: None—visual inspection only.
- Pros: Instant; no equipment.
- Cons: Highly subjective; error-prone near grade thresholds.
- Source: CenterGrade guide
Step-by-Step Example: Ruler/Caliper Method
- Prepare card: remove sleeves, place on a clean, flat, glare-free surface.
- Measure left border in mm; record the value.
- Measure right border in mm; record the value.
- Compute ratio: (left ÷ (left+right))×100, e.g., 3 mm ÷ 5 mm = 60%; right = 40%.
- Repeat for top and bottom borders.
- Compare ratios to grading thresholds (55/45, 60/40).
Source: Video tutorial
Common Challenges & Mistakes
- Unclear borders on vintage or borderless cards.
- Camera tilt causing apparent border shifts.
- Inaccurate rulers with worn markings.
- Human bias rounding measurements favorably.
- Neglecting back centering, which also affects subgrades.
Professional Card Centering Techniques vs DIY
Professional graders at PSA, BGS, and CGC follow standardized workflows:
- Use calibrated fixtures, laser-precise imaging, or design anchors (logos, text boxes).
- Consult internal centering charts that map ratios to subgrades.
- Evaluate front and back separately with specific tolerances.
- Controlled lighting and fixed camera rigs prevent distortion.
For a detailed comparison, see PSA, BGS & CGC centering tolerances compared.
Comparative Analysis
Accuracy & Consistency
DIY: Varies by tool, skill, and process.
Professional: Standardized methods yield repeatable precision.
Cost Considerations
- DIY: Inexpensive rulers, free apps, or modest AI subscriptions.
- Professional: Grading fees ($20–$200+ per card), shipping, insurance.
Time & Effort
- DIY: 5–15 minutes per card for careful measurements.
- Professional: Weeks turnaround; minimal hands-on time.
Impact on Final Grade
- DIY: Guides submission decisions; miscalls can waste fees.
- Professional: Official subgrades influence the final grade.
Case Studies
- Modern bordered card
- DIY ruler and AI tool both returned ~57/43 front, ~60/40 back.
- Professional grader confirmed PSA 10 centering.
- Borderless insert
- DIY methods struggled; pro used logo/text anchors for a 9.5 subgrade.
- DIY failed to capture true centering boundaries.
- Near-threshold 9 vs 10
- DIY pixel count showed 60/40; ruler method read 58/42.
- Collector risked expecting a 10 and receiving a 9, losing value.
Situational Guidance
- DIY: Ideal for low-value bulk screening and quick buy/sell decisions.
- Professional: Essential for high-stakes submissions, ambiguous designs, or auction-quality cards.
Tips for Better Grading Outcomes with DIY card centering techniques
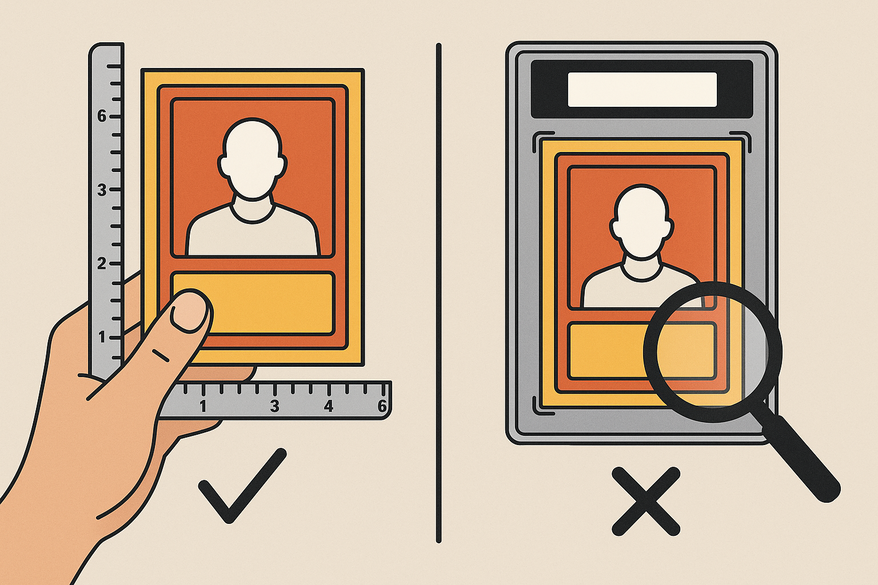
- Use high-quality, glare-free, square-to-lens photos for digital and AI methods.
- Measure multiple times and log results to ensure consistency.
- Always check both front and back centering.
- Learn centering thresholds for PSA, BGS, and CGC to align expectations.
- Recommended tools: precision mm rulers/calipers, overlays, AI-based centering apps.
- Maintain a clean, flat workspace with consistent lighting.
- Compare DIY logs with returned grades to refine your technique.
Conclusion
DIY card centering techniques empower collectors to pre-screen cards—from simple rulers to AI-driven apps—helping avoid wasted grading fees on poorly centered cards. Professional centering offers unmatched consistency and precision through calibrated equipment, controlled imaging, and trained graders, which is critical for high-value or complex cards. By understanding both approaches, you can optimize grading ROI: use DIY methods for bulk or low-risk cards and professional services for high-stakes or borderline cases.
Additional Resources
- How to read centering ratios for PSA grades
- Video walkthrough of ruler vs. pixel vs. AI centering
- AI centering services like CenterGrade
- Downloadable DIY centering checklist & printable overlay templates
- Forums for sharing centering examples and grading results
FAQ
- What is card centering?
Card centering measures how evenly the printed image sits within the card borders, expressed as a percentage ratio (e.g., 60/40). - Are DIY methods reliable?
DIY methods can be accurate with proper tools, technique, and lighting, but they vary by user skill and equipment quality. - When should I choose professional centering?
For high-value, borderless, or borderline cards where a one-grade swing significantly impacts market value. - How do I improve my DIY centering accuracy?
Measure multiple times, use high-quality rulers or AI tools, maintain consistent lighting, and compare results against returned grades. - Can AI replace manual measurements?
AI tools offer fast, objective results but depend on photo quality; combining both approaches yields the best confidence.