How to Achieve Optimal Lighting for Card Centering: A Complete Guide
Learn how to set up optimal lighting for card centering to ensure clear border visibility and accurate assessments using photography, tools, or AI.
8 min read
Key Takeaways
- Even, diffused, daylight-balanced lighting is essential for crisp, glare-free border visibility.
- Dual light sources at 45° angles and proper diffusion eliminate hotspots and shadows.
- Camera alignment and settings—perpendicular lens, low ISO, locked exposure—ensure sharp images.
- Consistent workflows enable reliable manual measurements and accurate AI-based centering.
- Troubleshooting tips solve common issues like glare, uneven illumination, and color casts.
Table of Contents
- Background on Lighting and Card Centering
- Importance of Lighting Optimization
- Factors Affecting Optimal Lighting
- Practical Step-by-Step Lighting Setup
- Do’s and Don’ts for Card Centering Lighting
- Equipment & Tools Recommendations
- Troubleshooting Common Lighting Problems
- Case Studies & Examples
- Conclusion
- Additional Resources
Background on Lighting and Card Centering
“Optimal lighting for card centering” refers to illumination that renders borders, edges, and print with maximum clarity and minimal glare. Precise measurements—whether 55/45 or 60/40 ratios—are vital in trading-card grading, photography, and AI-based centering tools. Poor lighting forces guesswork instead of accurate readings and can lead to grading rejects or misaligned online listings.
- Lighting conditions: intensity, direction, quality, and color temperature.
- Card centering: border ratio expressed in percentages (e.g., 55/45).
- Alignment errors: off-center shifts, rotation, and miscuts.
Learn how to measure centering manually or with AI in this step-by-step guide.
Importance of Lighting Optimization
Improper lighting can distort borders, introduce measurement errors, and confuse AI algorithms.
- Hidden or warped borders lead to under- or overestimation of thickness.
- Ruler, caliper, and pixel-based methods fail under glare and deep shadows.
- AI border detection needs even contrast to work reliably.
Optimal lighting ensures crisp borders, reveals subtle off-centering, and produces consistent images for grading pre-checks—saving both time and fees.
Discover cost-saving tips in this article.
Factors Affecting Optimal Lighting
- Light Intensity
- Too dim adds noise; too bright blows out borders.
- Aim for moderate, even brightness. - Light Angle and Direction
- Single overhead lamps cause glare or shadows.
- Two lights at ~45° angles prevent hotspots; camera perpendicular to card stops distortion. - Color Temperature
- Mixed sources cast unwanted tints.
- Use daylight-balanced lights (5000–6500K). - Diffusion
- Hard light causes sharp shadows and hotspots.
- Softboxes or parchment produce even illumination.
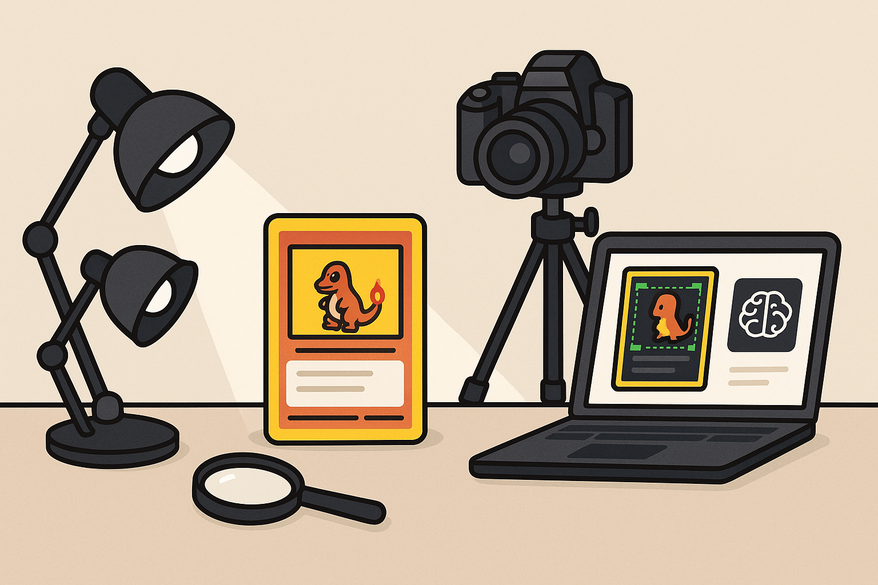
Practical Step-by-Step Lighting Setup
- Prepare Card & Background
- Matte surface (black, gray, or neutral).
- Remove glossy sleeves or use low-glare covers. - Position the Camera
- Overhead mount; lens perpendicular.
- Use main camera lens; stabilize with a tripod. - Set Up Lights
- Two lights at 45° angles with diffusion.
- Adjust distance for even coverage. - Dial Camera Settings
- Disable flash; set ISO low.
- Higher f-number for full-card sharpness; lock exposure and white balance. - Test & Refine
- Check for even borders, no hotspots, and neutral color.
- Tweak positions or add reflectors as needed.
For an effortless analysis, try the Card Centering Tool web app. Upload your well-lit images for sub-millimeter centering precision.
Do’s and Don’ts for Card Centering Lighting
Do:
- Use even, diffused multi-directional light.
- Align card and camera squarely.
- Zoom in for high-resolution checks.
- Employ neutral backgrounds and daylight-balanced sources.
Don’t:
- Rely on flash or undiffused lamps.
- Shoot at angles that distort ratios.
- Mix drastically different light sources.
- Trust previews without zoom or measurements.
Equipment & Tools Recommendations
Budget Options
- Adjustable LED desk lamps (brightness/color temp control).
- Clip-on LED panels with diffusion.
- DIY diffusers: parchment or white fabric.
- Phone tripod or overhead arm mount.
Professional Setups
- High-CRI (90+) LED panels (5000–6500K).
- Softboxes or strip softboxes.
- Light tents for 360° coverage.
- Macro/high-resolution lenses.
Centering-Specific Tools
- Rulers/calipers for precise mm measurements.
- Overlay grids or templates in the camera view.
- AI border-detection services for instant percentages.
- Plastic centering gauges for PSA-style checks.
Troubleshooting Common Lighting Problems
- Glare or Bright Streaks
Cause: direct reflection.
Fix: add diffusion, move lights, or tilt card slightly. - Uneven Illumination
Cause: single source.
Fix: introduce a second light or reflector. - Fuzzy Borders
Cause: low light/noise.
Fix: increase diffused intensity, focus manually. - Color Casts
Cause: mixed temps.
Fix: switch to daylight-balanced lights. - Inconsistent Measurements
Cause: shifting setup.
Fix: lock positions and settings.
Case Studies & Examples
Example 1: Single Card, Two Setups
Suboptimal: undiffused lamp overhead creates top-border glare, turning 55/45 into 65/35. Optimized: dual diffused lights at 45° reveal true 55/45 ratio.
Example 2: AI Centering Tool Accuracy
Poor lighting hides borders, causing AI misreads. Good lighting yields perfect alignment between AI analysis and manual caliper measurements.
Conclusion
Achieving optimal lighting for card centering involves using even, diffused, daylight-balanced sources and keeping the camera square to the card. This process ensures clear border visibility and accurate centering—by eye, calipers, or AI—boosting grading reliability and preventing costly mistakes. Document your ideal setup for consistent results on every card.
Additional Resources
- Visual centering guides & grading standards
- Video tutorials on measuring centering
- Pre-submission centering check tools & articles
FAQ
- What lighting setup yields the best card centering results?
Use two diffused, daylight-balanced lights at 45° angles with the camera perpendicular to the card. - Why is diffusion important?
Diffusion softens harsh beams, eliminates hotspots, and ensures even border illumination. - How do I align my camera correctly?
Mount it directly above the card with the lens parallel to the surface—use a tripod or overhead arm for stability. - How can I fix glare in my shots?
Add diffusion layers, move lights farther away, or slightly tilt the card or camera to redirect reflections. - Will AI centering tools work under poor lighting?
They will struggle: mixed shadows and glare confuse algorithms, leading to inaccurate centering percentages.


