How Improved Centering Helps You Save Grading Fees
Improve centering to effectively save grading fees by pre-screening trading cards, ensuring only high-potential submissions, and maximizing grading ROI.

7 min read
Key Takeaways
- Grading fees add up quickly and become wasted spend on low-grade returns.
- Mastering centering ratios (e.g., 55/45 vs. 60/40) lets you pre-screen cards and cut unprofitable submissions.
- Implementing strict pre-screen strategies and using precise tools can dramatically boost your grading ROI.
- Treat your grading process like a business: set clear rules, track results, and continuously refine.
Table of Contents
- 1. Understanding Grading Fees
- 2. The Role of Centering in Grading
- 3. Strategies to Save Grading Fees Through Improved Centering
- 4. Tools and Technologies
- 5. Best Practices and Tips for Optimizing Centering
- Conclusion
- Additional Resources
1. Understanding Grading Fees
Every submission costs money—services like PSA, BGS, SGC, and CGC charge per card for authentication, numeric grading, and encapsulation. Fees vary by turnaround speed, declared value tiers, and submission volume.
- Service tier: Economy (~30 days), Regular (~15 days), Express (~5 days)
- Value tier: Higher-value cards incur higher fees
- Submission size: Bulk discounts for larger batches
Example: Grading 100 cards at $20 each = $2,000. If half return below target grade, that’s $1,000 wasted.
Research shows mis-centered cards waste 40–60% of grading budgets. By cutting dead-weight submissions, you save grading fees and boost overall ROI.
2. The Role of Centering in Grading
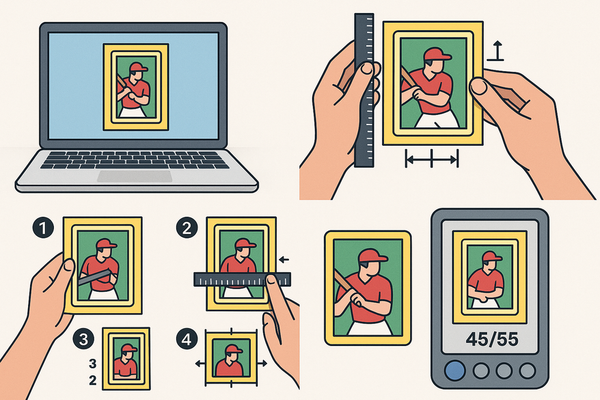
“Centering” describes how an image sits within a card’s borders. Graders quantify this with border ratios:
- 50/50 – Perfect
- 55/45 – Acceptable for top grades
- 60/40 – Often caps at Mint/9
- 70/30+ – Poor, limits high-grade potential
For a step-by-step walkthrough on measuring ratios, see How to Measure Card Centering: A Step-by-Step Guide for Collectors.
PSA’s GEM-MT 10 criteria tightened from 60/40 to 55/45 in at least one direction. Learn more in PSA 10 Centering Requirements. Even flawless corners and surfaces can’t overcome off-center borders.
- A 60/40 card often maxes at PSA 9 despite perfect edges.
- A PSA 10 at 55/45 can command 2–3× more than a PSA 9 at 60/40.
3. Strategies to Save Grading Fees Through Improved Centering
Focus on centering accuracy with these five proven tactics:
Strategy 1: Study Each Grader’s Centering Standards
Build a cheat sheet of ratios for PSA, BGS, SGC, and CGC. For a side-by-side comparison, visit PSA vs. BGS vs. CGC Centering Tolerances Compared. Then:
- Note exact ratios for your target grades.
- Keep the sheet handy when pre-screening.
Strategy 2: Pre-Screen Every Card for Centering
- Eyeball test: sort into “centered,” “borderline,” or “off-center.”
- Measure with a ruler, overlay, or app.
- Estimate ratios and compare to your cheat sheet.
- Submit only high-probability candidates.
Strategy 3: Use Minimum-Grade Submissions
Opt for “grade only if PSA 9+.” Cards below that return ungraded, sometimes with partial refunds—further reducing wasted fees.
Strategy 4: Separate Card Eras by Centering Sensitivity
- Vintage (pre-1980): Accept up to 60/40 if rare and flawless.
- Modern: Require ~55/45 or better for flagship rookies and inserts.
Strategy 5: Practice with Known Examples
Study real graded cards to hone your centering “eye.” Compare PSA 10s at different ratios using CardGrade – Centering Ratios Explained.
4. Tools and Technologies
Physical Centering Tools
- Transparent rulers with millimeter grids
- Plastic templates for L/R and T/B border checks
- Magnifying lamps or loupes for clear edge detection
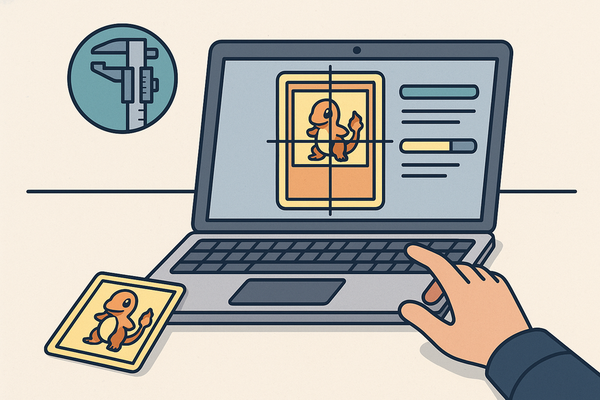
Digital and Mobile Tools
- Photo-based grading apps for centering estimates
- Basic editors with grid overlays—shoot square photos
For automated, sub-millimeter checks, try Card Centering Tool.
Spreadsheet & Tracking Systems
Log each card’s:
- Name & set
- Estimated centering
- Target grade & grader
- Submit/hold decision
- Returned grade
5. Best Practices and Tips for Optimizing Centering
1. Be More Conservative Than the Grader
If PSA allows 55/45 for a 10, set your cutoff at 53/47 to cover variance.
2. Adjust for Card Design
- Thick borders exaggerate differences.
- Full-bleed cards need precise tool checks.
- For asymmetrical art, focus on the printed frame.
3. Combine Centering with Other Checks
- Centering – stop if off.
- Corners – look for dings.
- Surface – scan for scratches.
4. Treat Bulk Submissions as Business
- Modern → 55/45, no flaws
- Vintage → up to 60/40, no creases
Conclusion
Improved centering assessment is one of the simplest, most effective ways to save grading fees and maximize ROI. By understanding fee structures, mastering ratios like 55/45 vs. 60/40, applying strict pre-screen strategies, and treating grading as a business, you’ll cut low-probability submissions, boost hit rates, and reduce waste.
Additional Resources
- CardGrade – Centering Ratios Explained (55/45 vs. 60/40)
- PSA Changed Its Grading Standards (and Why)
- PSA Grading Standards
- Visit Beckett for BGS Grading Standards
- Visit SGC’s official site for current guidelines
- Check CGC’s online grading criteria
FAQ
What is card centering and why does it matter?
Centering measures how evenly the image sits within the card borders. Poor centering often caps the highest possible grade, directly impacting resale value.
How can I measure centering accurately?
Use physical rulers or digital tools with grid overlays. Photograph cards straight on to avoid skew, then calculate border ratios.
Can I rely solely on digital apps?
Digital tools speed up estimates, but always cross-verify with a physical ruler or template to account for skewed photos and lighting.
How much can I expect to save?
By pre-screening for ideal centering, many collectors cut grading waste by 40–60%, turning thousands in fees into much higher ROI.