The Ultimate Card Centering Analyzer Tutorial
Learn how to use a card centering analyzer to transform card images into precise ratios, ensuring better grading and fewer surprises in submissions.

Estimated reading time: 7 min read
Key Takeaways
- Card centering analyzers auto-detect borders to calculate precise ratios like 60/40 or 55/45.
- Setup and use either mobile apps or web-based tools for quick pre-grading checks.
- Interpret ratios against PSA, BGS and CGC standards to avoid off-center surprises.
- Follow best practices—straight-on shots, clean background and manual guide checks—for consistent results.
- Advanced workflows include batch analyses, custom thresholds and integration with collection trackers.
Table of Contents
- Understanding the Card Centering Analyzer
- Setup and Installation
- Step-by-Step Tutorial
- Best Practices and Tips
- Advanced Use Cases
- FAQ
Understanding the Card Centering Analyzer
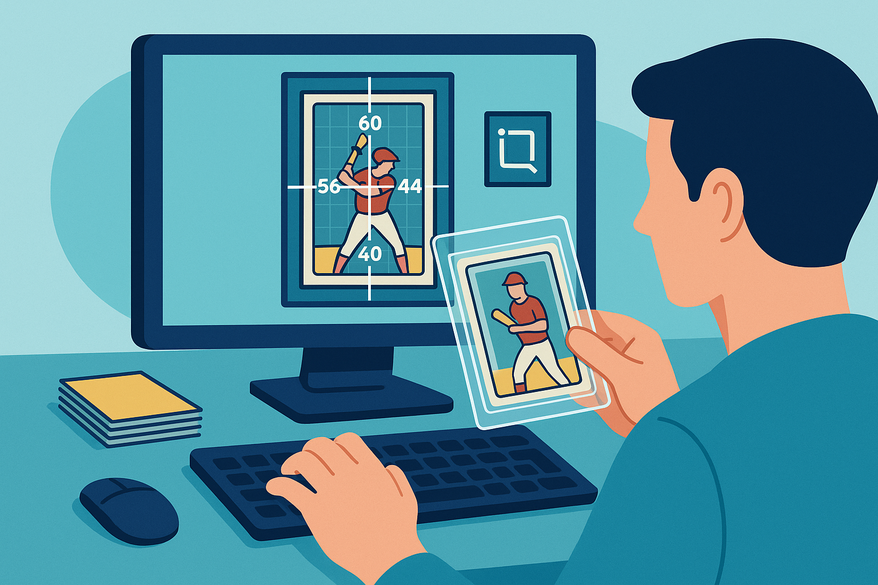
At its core, a card centering analyzer is your digital ruler for grading prep. This tool—also known as a centering tool or card centering calculator—automatically detects your card’s borders, measures border widths and delivers precise ratios like 60/40 or 55/45. Why does this matter? Because grading giants such as PSA, BGS and CGC penalize off-center cards, no matter how perfect the surface or corners.
As we explained in our How to Measure Card Centering: A Step-by-Step Guide for Collectors, proper centering analysis is the foundation of grading success.
“Accurate centering can be the difference between Gem Mint and a lower subgrade.”
- Formula example: smaller border ÷ (left + right) × 100 = left-right ratio
- Synonyms: centering tool, card centering calculator
- Common use cases: pre-screen before submission, compare front/back, validate listings
Setup and Installation
Prerequisites & System Requirements
- Smartphone (iOS/Android) or desktop with a modern browser
- Clear, straight-on camera setup
- Latest OS and Chrome/Safari/Edge/Firefox
- Internet connection for web tools
Mobile App Installation
- Open App Store or Google Play and search “Card Centering Calculator”.
- Verify the developer (e.g., Arda Şen or Jade Lizard Software LLC).
- Tap Install/Get, then Launch the app.
- Grant camera and photo-library permissions when prompted.
Web Tool Setup
- Go to your favorite centering site (e.g., CardGrade).
- Review photo guidelines: plain background, no sleeves.
- Create an account if required.
- Familiarize yourself with the upload area and manual-adjust controls.
Step-by-Step Tutorial
1. Overview of the Interface
- Main upload/scan area
- Draggable measurement overlays
- Centering ratio display
- Grading-mapping panel for PSA, BGS, CGC, etc.
- Zoom, reset and auto-level tools
2. Uploading or Scanning Your Card
Mobile: Tap “Scan” or “Upload,” position the card on a solid background and hold the camera squarely.
Web: Click “Upload Front” or “Upload Back” and wait for the auto-detect.
For expert tips, see our Trading Card Photography Guide: How to Capture Cards for Grading Accuracy.
3. Adjusting Measurement Guides
- Drag the guides to the printed border—avoid artwork edges.
- Use zoom or a precision loupe if available.
- Apply auto-rectification for a perfect top-down view.
4. Interpreting Centering Ratios
- Read left-right and top-bottom ratios (e.g., 60/40, 55/45).
- Identify which side limits your grade.
- Compare against grading standards for PSA, BGS, CGC, SGC and TAG.
5. Running Multiple Analyses
- Repeat scans to ensure consistency.
- Use batch or history/export features if available.
Best Practices and Tips
Follow these steps to avoid common pitfalls:
- Always shoot straight-on—any tilt skews the ratio.
- Use a clean, contrasting background to help detection.
- Remove sleeves or top-loaders to prevent reflections.
- Take multiple photos until the results stabilize.
Stay up to date:
- Keep your app or tool updated for the latest AI refinements.
- Recalibrate if your tool offers reference guides.
- Monitor grading standard updates and adjust your thresholds.
Advanced Use Cases
- Combine centering analysis with corner, edge and surface checks.
- Set custom thresholds (e.g., ≥60/40 both sides) to filter inventory.
- Track predicted vs. actual grades with a 10-card case study.
- Integrate output into collection trackers or grading submission apps.
FAQ
- Does centering alone determine the grade?
- No—corners, edges and surface quality also play critical roles.
- Why do front and back centering differ?
- Printing tolerances vary; grading services use the worst side.
- What is a “good” ratio?
- Aim for ≥60/40 or ideally closer to 50/50 for top grades.
- What if auto-detect is off?
- Manually adjust the guides or retake the photo straight-on.
- Can I measure slabbed or sleeved cards?
- Not recommended—reflections and glare can distort measurements.