Ultimate Card Centering Analyzer Tutorial: A Complete User Guide
Learn to use a card centering analyzer for precise grading: setup, run analysis, interpret results, and optimize workflow. Perfect for PSA, BGS standards.
8 min read
Key Takeaways
- Automated card centering analyzer measures border widths to deliver precise centering ratios.
- Supports PSA, BGS, CGC, SGC, and TAG grading standards.
- Step-by-step workflow: input images, auto-detect borders, manual fine-tuning, and interpret results.
- Advanced features include batch processing, AI auto-rectification, and customizable grading profiles.
- Troubleshooting tips ensure optimal photo setup, manage glare, and consistent readings.
Table of Contents
- Introduction
- Overview of Card Centering Analyzer
- Getting Started
- Step-by-Step Guide: Core Tutorial
- Advanced Features & Tips
- Use Case Scenarios
- Conclusion & Next Steps
Introduction
Precise centering can make or break a card’s grade. Centering measures border widths around a card’s printed image. A card centering analyzer transforms raw photos into actionable centering ratios (e.g., 60/40, 55/45) and compares them against grading standards, helping you optimize submission decisions.
In this guide you will learn how to set up, configure, run the analyzer, interpret results, use advanced features, and apply everything in real scenarios.
- How to measure centering on front & back
- How to interpret ratios against PSA, BGS, CGC, SGC, and TAG standards
- How to troubleshoot common issues and optimize workflow
Overview of Card Centering Analyzer
A card centering analyzer (also called a card centering calculator or card centering tool) uploads or scans card images, auto-detects borders via AI or basic image processing, lets you manually adjust guides, then outputs centering ratios and grade estimates.
For a refresher on manual vs. automated measurements, see our How to Measure Card Centering: A Step-by-Step Guide for Collectors.
Key benefits:
- Faster decision-making: instant centering checks meeting PSA’s typical 55/45 or 60/40 thresholds.
- Greater accuracy vs. eyeballing: automated measurements minimize human error.
- Front + back evaluation: shows worst-side centering, matching grading rules.
- Better ROI: avoid submission fees on off-center cards.
Getting Started
For a precise, web-based solution, check out Card Centering Tool, which measures left-to-right and top-to-bottom centering ratios to PSA, BGS, and CGC tolerances, so you know which cards are worth grading.
Access & Setup
- Web-based: open a free online calculator at cardgrade.io/tools/centering or jadelizardsoftware.com/card-centering-calculator.
- Mobile app: install “Card Centering Calculator” from Google Play or the App Store.
Prerequisites & System Requirements
- Device: smartphone, tablet, or computer with a modern browser or supported OS.
- Camera or clear existing photos.
- Internet connection for cloud-backed tools.
- Optimal photo setup: non-reflective background, diffused lighting, 90° overhead shot, card out of sleeves/top loaders.
Initial Configuration Steps
- Create an account if required (for history and cloud sync).
- Grant camera access for live capture.
- Select default grading standard (PSA, BGS, CGC, SGC, TAG).
- Enable auto-border detection and manual override.
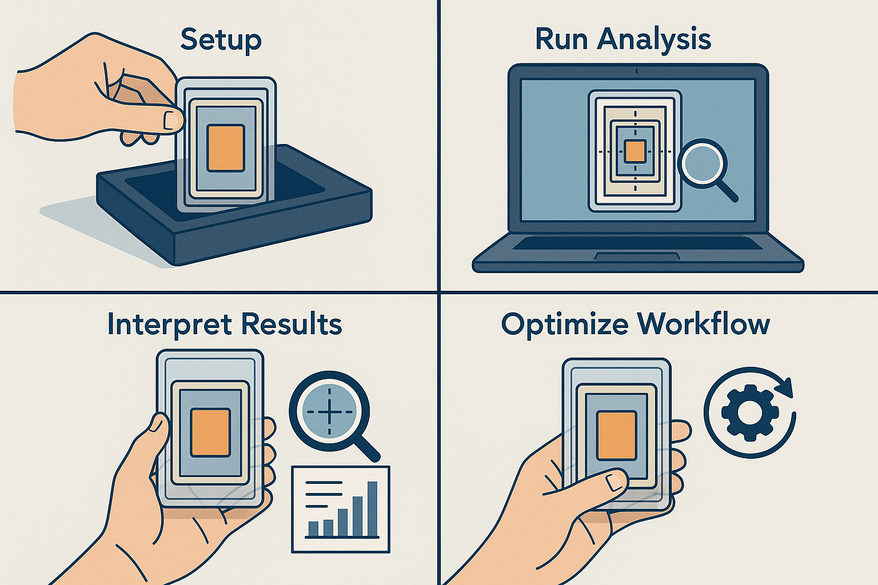
Step-by-Step Guide: Core Tutorial
Step 1: Navigating the User Interface
On launch you’ll see:
- Main dashboard with “Upload Image,” “Scan Card,” “Take Photo,” and “Results.”
- Tabs for Front / Back views.
- Settings gear icon and help section.
Tips: locate measurement guides, zoom tool, and instructions in the help area.
Step 2: Inputting Data & Configurations
Method A – Upload photos:
- Click “Choose File.”
- Select the front image, then the back if supported.
Method B – Live capture:
- Choose “Take Photo.”
- Place the card on a solid background and align in the frame.
- Follow on-screen guides.
Pre-run checks: select card type/size, grading profile, toggle auto/manual mode.
Tips: upload front and back to identify limiting side; take multiple shots.
Step 3: Running the Analyzer
- Click “Run Analyzer” or “Calculate Centering.”
- Auto-detection crops and rectifies perspective.
- The app measures opposite border widths.
Centering % formula: smaller border ÷ (sum of both borders) × 100. Example: 1.8 mm vs. 1.2 mm → total 3.0 mm → 60/40 centering.
Manual fine-tuning: drag guides, zoom for pixel accuracy, re-run.
Tips: verify auto-detected lines; avoid glare and reflections.
Step 4: Interpreting Results
Typical outputs:
- Left/Right ratio and Top/Bottom ratio.
- Combined front/back score with a worst-side flag.
- Grade estimates for PSA, BGS, CGC, SGC, TAG.
Centering ratio guide:
- 50/50: perfect.
- 55/45 or 60/40: usually acceptable.
- 70/30+: often fails top-grade.
For detailed standards, check out our PSA 10 Centering Requirements: What You Need to Know Before Submitting and PSA vs BGS vs CGC: Centering Tolerances Compared.
Tips: check both axes, focus on the limiting side, and use the tool as a guide, not a guarantee.
Advanced Features & Tips
Advanced Settings & Customization
- Grading profile presets: choose PSA, BGS, CGC, SGC, or TAG thresholds.
- AI auto-rectification: corrects slight angles automatically.
- Batch processing: measure multiple cards in one session.
- Saving/exporting: download reports or screenshots.
Troubleshooting Common Issues
- Mis-detected borders: improve photo angle/background or switch to manual guides.
- Inconsistent readings: maintain consistent camera height and angle; average multiple shots.
- Glare/reflections: remove sleeves and use diffused lighting.
Use Case Scenarios
Scenario 1: Pre-screening for PSA 10 Potential
Front: 60/40 L/R, 55/45 T/B; Back: 65/35 L/R, 60/40 T/B. The back limits the grade to PSA 9, so decide to submit or wait for a better copy.
Scenario 2: Comparing Raw Copies
- Copy A: 60/40, 55/45
- Copy B: 70/30, 65/35
- Copy C: 55/45, 55/45 → best centering for top-grade pursuit.
Scenario 3: High-end Sale Listing
Include a centering screenshot (“Front approx. 55/45, Back 60/40”) to build buyer trust.
Conclusion & Next Steps
A card centering analyzer combines AI border detection, manual fine-tuning, and grading-standard profiles to boost grading success. Use it to measure front/back, interpret ratios, troubleshoot issues, and integrate centering checks into your grading workflow.
Next steps:
- Choose your tool (web or app).
- Practice on varied cards.
- Apply analysis in your buy/sell decisions.
- Share feedback and screenshots.
FAQ
- What is a card centering analyzer?
- An automated tool that measures border widths on trading cards to calculate centering ratios and estimate grades based on popular grading standards.
- Which grading standards are supported?
- PSA, BGS, CGC, SGC, and TAG thresholds are available via presets or custom profiles.
- How can I reduce glare and reflections?
- Remove sleeves, use a non-reflective background, employ diffused lighting, and consider multiple angled shots for consistency.
- Can I process multiple cards at once?
- Yes, use the batch processing feature to measure several cards in one session and export consolidated reports.


