Card Centering Mistakes: How to Spot, Fix, and Prevent Them
Learn how to spot, fix, and prevent card centering mistakes to protect grading value and enhance design quality. Avoid submission fees and aesthetic flaws.

Estimated reading time: 8 minutes
Key Takeaways
- Accurate centering enhances aesthetic appeal and maximizes grading value.
- Common pitfalls include uneven borders, misaligned elements, and relying solely on the “eyeball test.”
- Use precise tools, digital templates, and workflow guides to measure and correct centering.
- Inspect both front and back sides, and account for print tolerances to avoid submission fees.
- Following grading standards and professional best practices prevents costly mistakes.
Table of Contents
- Introduction
- Section 1: Explanation of Card Centering
- Section 2: Common Card Centering Mistakes
- Section 3: In-Depth Analysis of Each Mistake
- Section 4: Strategies to Correct Card Centering Mistakes
- Section 5: Expert Tips and Best Practices
- Conclusion
Introduction
Card centering is the positioning of the main image and text relative to a card’s borders. Proper centering matters for both aesthetics and functionality—gameplay readability depends on aligned icons, and grading value hinges on precise centering. For a step-by-step tutorial on measuring centering ratios, visit our detailed guide.
Section 1: Explanation of Card Centering
Understanding Trading Card Centering
- Left–Right Centering: Measures if the left and right borders are equal (50/50 perfect; PSA 10 front ~55/45).
- Top–Bottom Centering: Measures if the top and bottom borders are equal.
- Front vs. Back: Graders often weigh front centering more; back centering matters but has looser tolerances.
Source: PSA Grading Centering Guidelines
Centering in Design and Printing
- Trim Lines: The final cut line of the card.
- Bleed Areas: Artwork extending beyond the trim to avoid white edges.
- Safe Zones: Inner margins to keep critical content from being cut.
Source: Print Industry Bleed & Trim Guide
Why Perfect Centering Matters
- Aesthetics & Perceived Quality: Even a 60/40 split is noticeable; off-center cards appear cheap or misprinted.
- Game Functionality: Misplaced stats or icons hinder gameplay; symmetry supports intuitive play.
- Grading Standards & Value: Centering is one of four major sub-grades; a 55/45 ratio often distinguishes a PSA 10 from PSA 9.
Section 2: Common Card Centering Mistakes
Here are the top 10 card centering mistakes collectors, graders, and designers make:
- Uneven borders (left/right or top/bottom)
- Misaligned text or images within even borders
- Relying only on the “eyeball test”
Description: Judging centering by eye yields inconsistent results (e.g., mistaking 55/45 for 50/50).
Impact: Sending out poorly centered cards for grading; overlooking cards that actually qualify.
Causes: Visual illusions in busy backgrounds; insufficient lighting conditions. (See how to tell if your card is off-center before grading for more.) - Measuring from the wrong reference points
- Using miscalibrated tools or software settings
- Ignoring card back centering
- Camera/scan distortion when checking centering
- Not accounting for print tolerances and cut lines
- Incorrect use of centering tools/templates
- Misunderstanding grading standards (e.g., 60/40 vs 55/45)
Section 3: In-Depth Analysis of Each Mistake
1. Uneven Borders
Description: One border measures 3 mm vs. 2 mm on the opposite side (a 60/40 split).
Impact: Drops grading sub-grade; detracts from professional design appearance.
Causes: Printing shifts; misaligned cutting blades; artwork not centered in the template.
2. Misaligned Text/Images
Description: Titles sit too high or artwork drifts left within an otherwise centered frame.
Impact: Visual imbalance; game icons mislead players during fast play.
Causes: Text boxes not locked to center guides; accidental layer shifts in design software.
3. Eyeball Testing Only
Description: Judging centering by eye yields inconsistent results.
Impact: Sending out poorly centered cards; overlooking qualified cards.
Causes: Visual illusions; insufficient lighting.
4. Wrong Reference Points
Description: Measuring from the card edge rather than the printed frame or inconsistent borders on borderless cards.
Impact: Overestimating centering; unpredictable grading outcomes.
Causes: Modern borderless designs; masking by inconsistent border widths.
5. Miscalibrated Tools
Description: Worn rulers, uncalibrated screen rulers, or skewed templates distort measurements.
Impact: Systematic errors across batches or collections.
Causes: Cheap rulers; screen resolution scaling; DIY printed grids not at 100% scale.
6. Ignoring Card Back
Description: Front centering is acceptable but the back is shifted or rotated.
Impact: Overall centering sub-grade suffers; unexpected grading caps.
Causes: Collectors rarely inspect the back; busy back designs hide off-center issues.
7. Camera/Scan Distortion
Description: Photos taken at angles make one border appear longer; wide-angle lenses warp edges.
Impact: Inaccurate pre-check measurements; misleading AI-tool data.
Causes: Camera tilt; non-telephoto lenses; glare.
8. Ignoring Print Tolerances
Description: Digital files look perfect, but physical cards vary by ±0.5 mm due to cutting.
Impact: Designers blame the file when the printer’s tolerance is the issue.
Causes: Industrial press sheet shifts; blade alignment variance.
Source: Print Industry Bleed & Trim Guide
9. Wrong Use of Centering Tools
Description: Centering gauge rotated slightly or card not fully under the window.
Impact: False confidence in centering accuracy.
Causes: Ignoring tool instructions; not checking both axes.
10. Misunderstanding Grading Standards
Description: Confusing PSA 10 front tolerance (55/45) with PSA 9 (60/40) or other companies’ requirements.
Impact: Submitting cards that can never hit desired grades; under-valuing qualified cards.
Causes: Relying on hearsay; not reading official manuals.
Source: PSA Grading Centering Guidelines
Section 4: Strategies to Correct Card Centering Mistakes
Physical Cards: Correct Centering
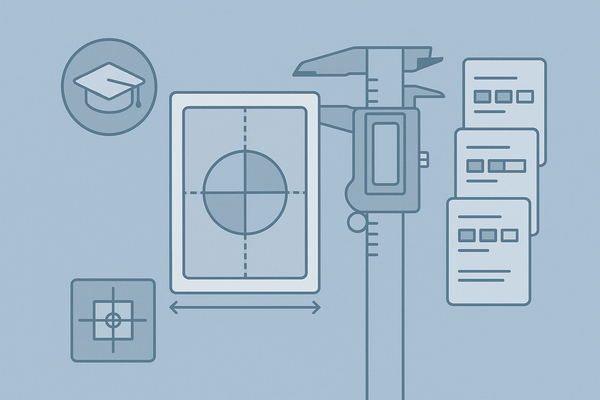
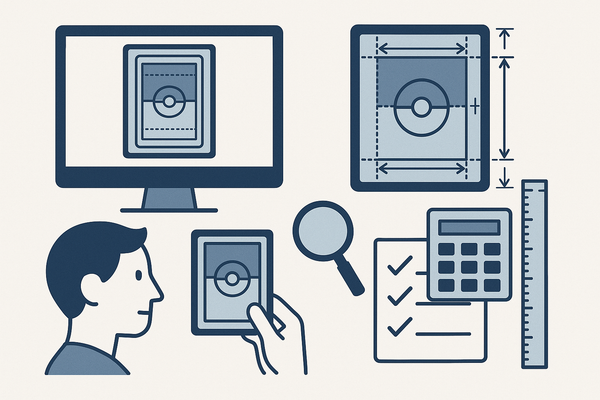
- Use precise tools: millimeter ruler or digital caliper; transparent centering gauge; CenterGrade AI for automated ratio calculation.
- Photograph flat with even light; avoid tilt or wide-angle.
- Measure top vs. bottom and left vs. right; compute centering ratio.
- Compare to official charts: PSA 10 front ~55/45 or better.
Source: PSA Centering Guidelines
To compare top centering tools for 2024, check out the best card centering tool for 2024.
Digital/Design Workflow: Design Guides
- Activate rulers, guides, and safe-zone layers in Illustrator, InDesign, Photoshop, or Figma.
- Set artboard to card dimensions (e.g., 63 × 88 mm).
- Use Align Horizontal/Vertical Center relative to artboard or inner frame; snap-to-grid and lock template layers before export.
- Leverage plugins: Adobe Align Guide; Figma CenterIt Plugin.
For an even easier way to measure card centering with sub-millimeter precision and instant grading tolerance checks, try Card Centering Tool, which helps collectors avoid costly submission errors.
Section 5: Expert Tips and Best Practices
For Collectors and Graders
- Always measure both axes and front/back.
- Use worst-case thinking (grade by worst axis).
- Keep a submission spreadsheet of ratios.
- Photograph on a non-reflective background, straight down.
For Designers and Printers
- Build & lock a master template with bleeds, trims, safe zones, and center guides.
- Align via software tools—never eyeball.
- Proof print at actual size and inspect multiple samples.
- Communicate printer cutting tolerances (e.g., ±0.5 mm) and adjust border thickness.
Conclusion
Preventing card centering mistakes—uneven borders, misaligned elements, measurement errors, and misunderstanding grading standards—protects your grading value, enhances design quality, and saves submission fees. Use precise measurement, follow workflow integrations, and apply the strategies above to maintain perfect centering. Now it’s your turn: apply these centering tips, share your experiences, and post additional tricks in the comments below.
FAQ
What tolerance is considered acceptable for PSA 10 centering?
PSA 10 front centering tolerance is typically 55/45 or better on both left–right and top–bottom axes.
How do I measure centering accurately at home?
Use a millimeter ruler or digital caliper and a transparent centering gauge; photograph your card flat with even lighting and compare border widths precisely.
Does back centering affect my card’s final grade?
Yes. While front centering carries more weight, an off-center back can lower your overall centering sub-grade and cap your final grade.
Can digital design tools prevent centering errors?
Absolutely. Activating safe-zone layers, using align-to-artboard features, and locking template guides in software like Illustrator or Figma eliminate most design-phase centering issues.