Card Centering Analyzer Tutorial: How to Measure Card Centering for Better Grading Results
Learn to use card centering analyzers for precise grading outcome predictions in this detailed tutorial, featuring setup, adjustments, and integrations.
Estimated reading time: 10 minutes
Key Takeaways
- Measure with precision: Use a centering analyzer to compute sub-millimeter ratios aligned with PSA, BGS, CGC, and SGC standards.
- Flexible setup: Choose between web-based tools, mobile apps, or physical overlays to fit your workflow.
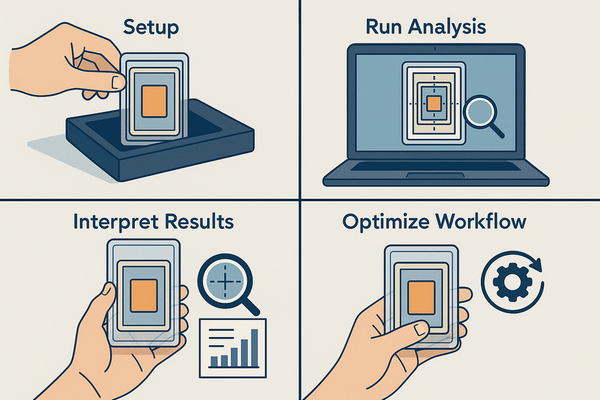
- Step-by-step process: Capture images, auto-detect borders, fine-tune manually, and interpret centering percentages accurately.
- Troubleshoot & optimize: Resolve lighting, angle, and detection errors; follow best practices for consistent outcomes.
- Data-driven submissions: Predict grading results, save on fees, and make informed submission decisions.
Table of Contents
- Introduction
- Overview of the Card Centering Analyzer
- Step-by-Step Tutorial
- Troubleshooting
- Best Practices
- Conclusion & Further Resources
- FAQ
Introduction
A card centering analyzer tutorial helps collectors and graders use a specialized tool—web-based, mobile, or physical—to measure how well a card’s artwork sits within its borders. Early, precise centering analysis can predict grading outcomes from PSA, BGS, CGC, and SGC, saving time and submission fees. A card centering analyzer outputs ratios like 60/40 or 55/45 to match grading standards. This step-by-step guide covers installation, setup, image capture, manual adjustments, result interpretation, troubleshooting, and workflow integration. Ready to optimize your grading decisions? Let’s get started.
For a fast, accurate, and user-friendly web-based solution, consider Card Centering Tool, which automatically measures centering to sub-millimeter precision and checks PSA, BGS, and CGC tolerances before you submit your cards.
Overview of the Card Centering Analyzer
What Is a Card Centering Analyzer?
A card centering analyzer tutorial covers tools—digital or physical—that measure border widths to compute centering ratios. For a ruler-based approach, refer to our how to measure card centering guide.
Core Functions
- Image upload or live scan of front (and back) artwork
- Auto-detection of card edges with draggable measuring lines
- Calculation of centering ratios (e.g., 60/40, 55/45, 50/50)
- Mapping centering output to PSA, BGS, CGC, SGC subgrade thresholds
Use Cases and Scenarios
- Pre-grading evaluation to decide submission value
- Analyzing seller photos before raw card purchases
- Selecting the best-centered copy from multiple raw cards
- Post-grading review to understand received subgrades
- Content creation: grading videos, blog posts, and tutorials
Prerequisites and Setup
Digital Analyzer Needs:
- A camera, smartphone scanner, or flatbed scanner
- Flat, non-reflective surface with a solid-color background
- Even, diffused lighting; remove sleeves or top loaders
Physical Overlay Tool Needs:
- The raw trading card
- A transparent centering overlay with printed grid or scale
- Flat surface and microfiber cloth for cleaning
Step-by-Step Card Centering Analyzer Tutorial
1. Accessing or Installing the Card Centering Analyzer
- Web-based:
- Open your browser (desktop or mobile)
- Navigate to a free online centering tool (e.g., CardGrade)
- Confirm support for front and back uploads and grading projections
- Mobile app:
- Open App Store (iOS) or Google Play (Android)
- Search “card centering calculator” or “centering tool”
- Install the app; grant camera and photo permissions
2. Preparing Your Card and Workspace
- Place the card on a flat, non-reflective surface with a plain background
- Remove any sleeves, top loaders, or holders to eliminate glare
- Use soft, diffused lighting to avoid shadows and hotspots
- Position your camera at 90° directly above the card
- Capture the full card with a small margin around it for cropping
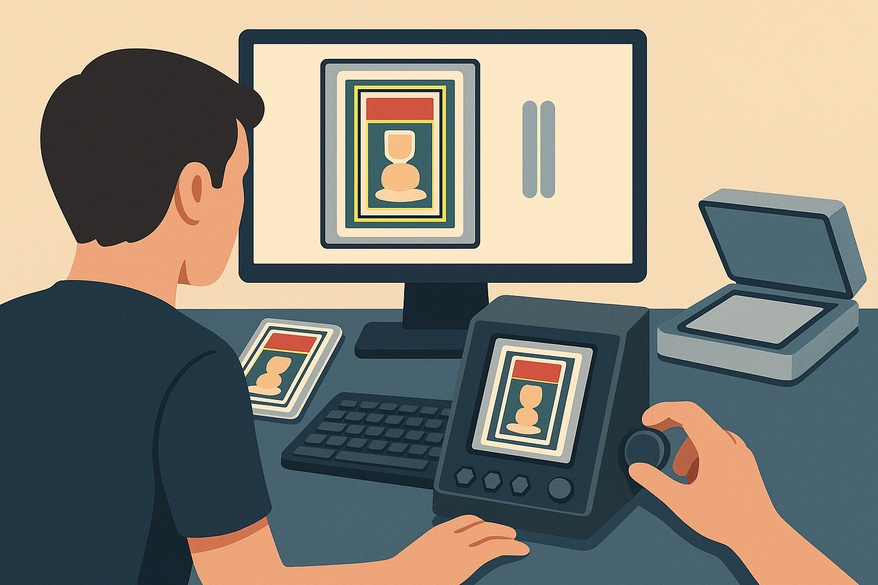
3. Capturing or Uploading the Card Image
- Upload existing images:
- Click “Upload front of card,” select photo, wait for processing
- Then upload “back of card” if supported for combined scoring
- Live capture or scan:
- In-app, choose “Scan card” and follow on-screen guides
- Capture front first; flip and capture back when prompted
4. Border Detection and Manual Adjustment
- Auto-detection: tool draws measuring lines on detected edges
- Manual fine-tuning: drag corner handles to match true card edges
- Ensure overlay aligns with printed borders, not packaging edges
- If borders misalign: recapture directly overhead, improve lighting, move camera further back
5. Understanding the Centering Calculation
- Measure border widths on both sides (left/right or top/bottom)
- Formula: smaller border ÷ (sum of both borders) × 100
- Example: left = 1.8 mm, right = 1.2 mm → 1.8/3.0 = 60% → 60/40 centering
- Tool displays centering as “60/40,” “55/45,” etc., for both axes
6. Reading Results and Grading Projections
- View front centering and back centering percentages
- Identify limiting side: grading companies gate on the worst of the two sides
- See projected subgrades for PSA 10/9, BGS 10, CGC 10, SGC 10, etc.
- Workflow advice: submit if centering meets gem thresholds, or choose looser graders if borderline
For a detailed centering tolerance comparison across graders, check our in-depth guide.
7. Options, Customizations, and Optimization
- Modes: front-only vs. front + back analysis
- Grading company presets to match centering standards
- Adjust sensitivity of manual border controls
- Select measurement units (mm/inches) and card size presets
Tips:
- Always analyze both sides for accurate gating
- Fine-tune draggable lines for exact border alignment
- Save screenshots of results for records and listings
8. Physical Card Centering Analyzer: Quick How-To
- Prepare overlay: remove protective film for clarity
- Lay card flat; place overlay grid on top, aligning edges
- Read scale units where card borders intersect the grid
- Convert readings via supplied reference table to percentages and grade thresholds
- After measurement, clean card with a microfiber cloth, then sleeve and load
Troubleshooting
Common Errors & Causes
- Inaccurate border detection: shadows, reflections, busy backgrounds
- Skewed or stretched images: shot at an angle, lens distortion
- Extreme centering results vs. visual impression: misaligned overlays, low-res images
- Front/back mismatch: one side gates combined grade
- Ambiguous readings on physical tools: borderless designs confuse scale alignment
Solutions & Tips
- Improve image capture: flat background, even lighting, camera at 90°, more distance then crop
- Use manual adjustments: zoom in and fine-tune border lines precisely
- Choose clear reference points: align guides to logos or text boxes when borders are faint
Best Practices
Maximizing Efficiency
- Standardize photo setup: same surface, lighting, and distance for all cards
- Batch workflow: photograph multiple cards, then analyze in sequence
- Combine with a precision loupe for more accurate manual guide alignment
- Cross-check results across web, mobile, and physical tools for consistency
Digital Tools:
- Keep apps and browsers updated for the latest feature improvements
- Sanity-check with a known 50/50 centered card periodically
Physical Tools:
- Clean overlays with a microfiber cloth to remove scratches or dust
- Store flat to prevent warping or bending of printed grids
Conclusion & Further Resources
Key Takeaways
- A card centering analyzer empowers you to measure artwork alignment and predict grading outcomes
- Accurate setup, capture, border adjustment, and calculation ensure reliable centering ratios
- Interpreting results and projections helps you choose submission strategies and grading companies
- Troubleshooting, best practices, and workflow integration save time and improve grading success
Benefits
Using a card centering analyzer means data-driven submission decisions, higher grading consistency, and fewer wasted fees on off-center cards.
Further Resources
- CardGrade online centering tool
- Card Centering Calculator (iOS)
- Card Centering Calculator (Android)
- Jadelizard Software Centering Calculator
- Reddit centering-check discussion
- Video tutorials:
- Save on grading fees with improved centering
Call to Action
Apply this card centering analyzer tutorial in your grading workflow today. Measure, analyze, and submit with confidence—and visit the resources above for ongoing support.
FAQ
- Q1: Why does it show 60/40 when it looks perfect?
- A1: The analyzer measures to tenths of a millimeter. Tiny variances appear larger at scale. Realign guides and recapture under better conditions.
- Q2: Do I need both front and back images?
- A2: Yes. Graders gate on the worse side; excellent front centering can be negated by poor back centering.
- Q3: My photo’s edges look curved. How can I fix that?
- A3: Move the camera farther away, center the card in frame, and crop afterward to reduce lens distortion.
- Q4: Can I measure through a sleeve?
- A4: No. Remove sleeves or top loaders to avoid glare and inaccurate border detection.